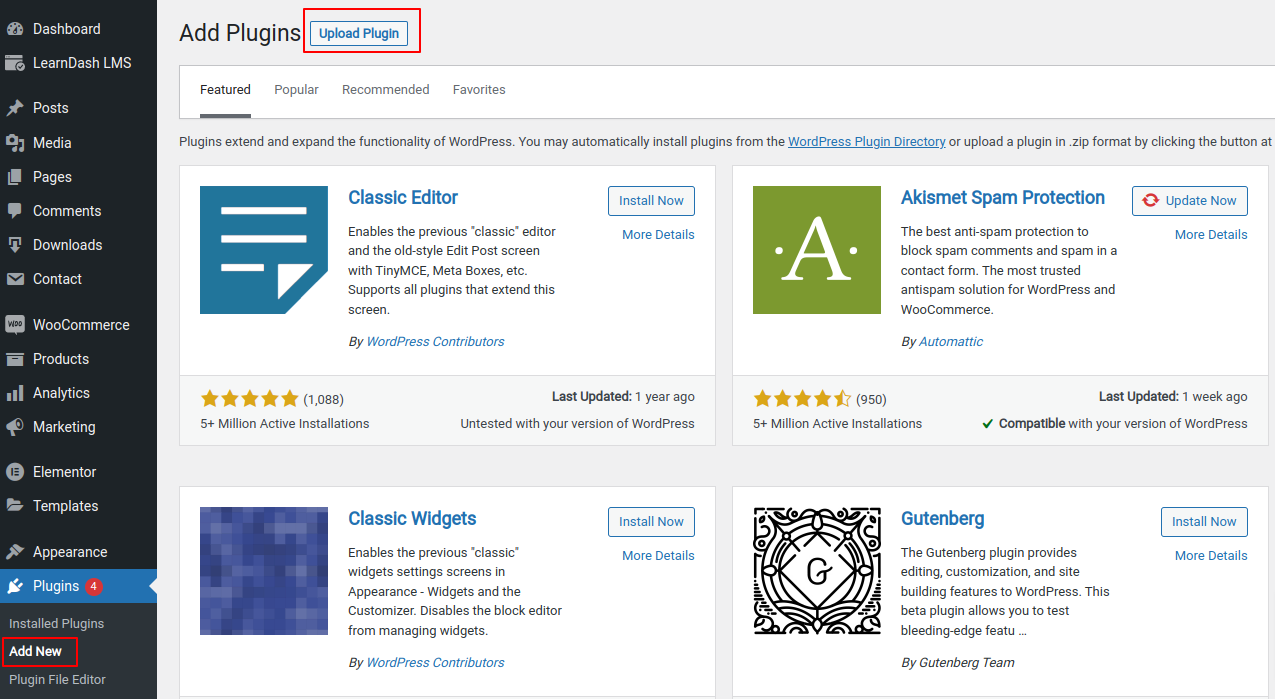
- In WordPress download the Plugin file & navigate to PLUGINS > ADD NEW
- Click Upload Plugin
- Browse for the .zip file you downloaded in Step 1
- Click Install Now
- Click Activate Plugin
- You will find plugin setting page on the Dashboard Menu named as ‘Cart Messages’
Installation Instruction
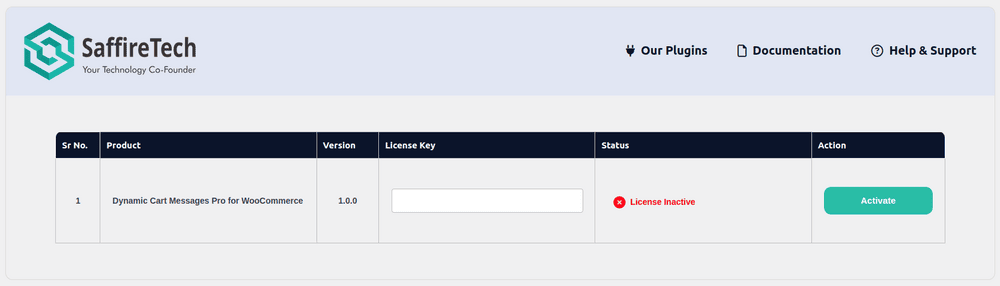
License Activation
- Navigate Plugins > Activate Licence Key.
- Find your license key in the Purchase Receipt sent to your email or you can retrieve it from, My Account > Purchase History > View Licenses on the SaffireTech website.
- Enter Your license key in the license key field.
- Click Activate License.
- You will find the validity of your license below.
General Settings
- Click on Cart Messages > Global Settings.
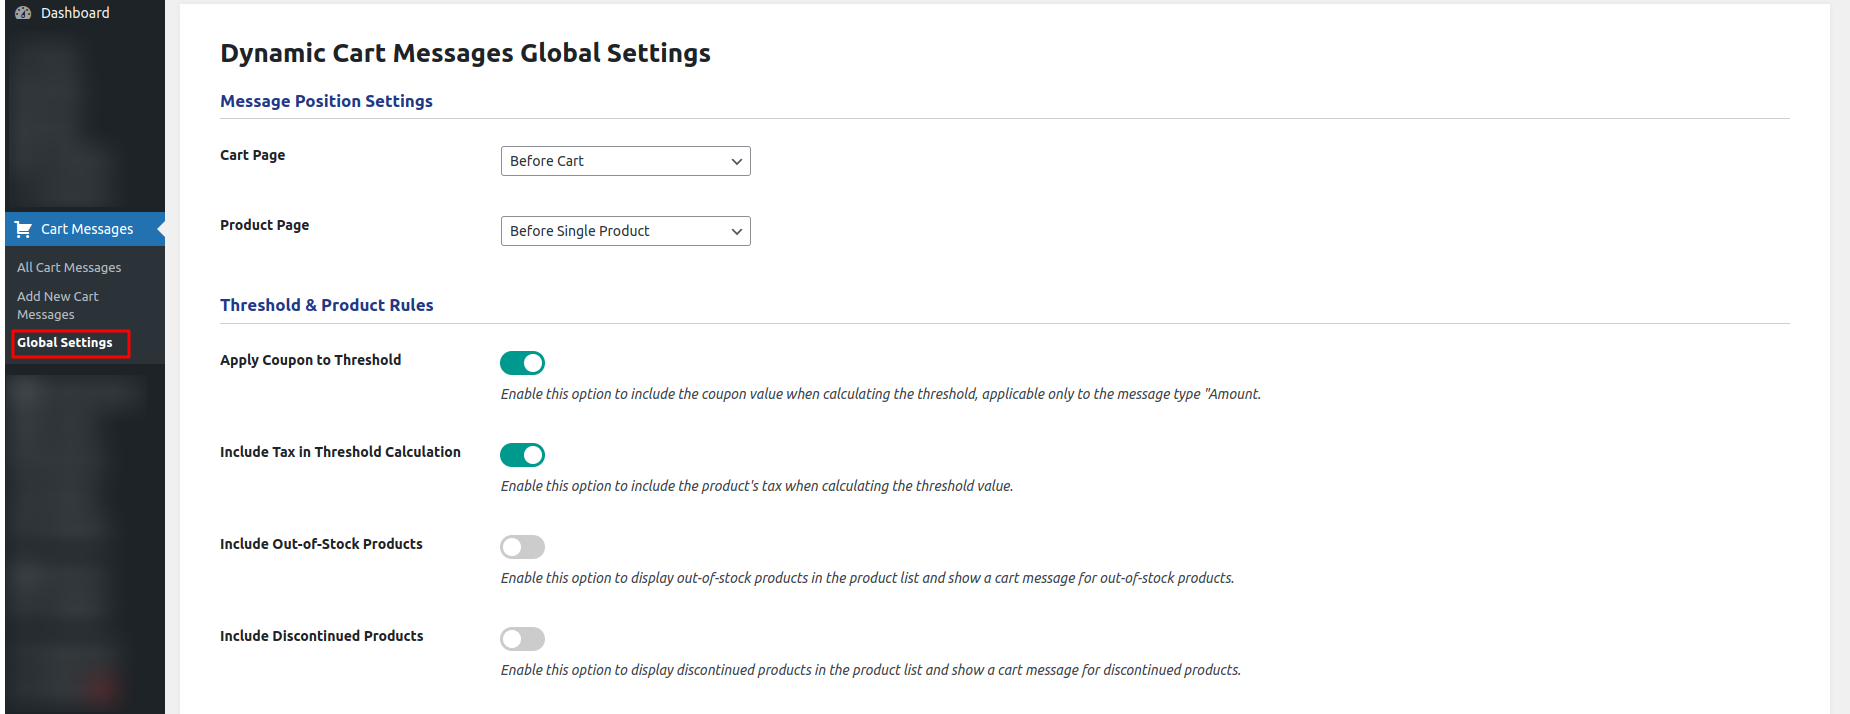
- In the Global Settings page, you will find 7 sections
-
- Message Position Settings :

This setting allows users to select where the cart message should be displayed on the product and cart pages. The available positions are:
-
-
- Cart Page
- Before Cart Table: Displays the cart message above the cart table, before the list of products in the cart.
- Before Cart: Displays the cart message at the very top of the cart page.
- Before Cart Contents: Displays the cart message above the contents section of the cart.
- Before Cart Totals: Displays the cart message above the cart totals section, just before the total calculation area.
- Product Page
- Before Main Page: Displays the cart message at the top of the product page, before all content.
- Before Single Product: Displays the cart message immediately before the single product details section.
- Cart Page
-
-
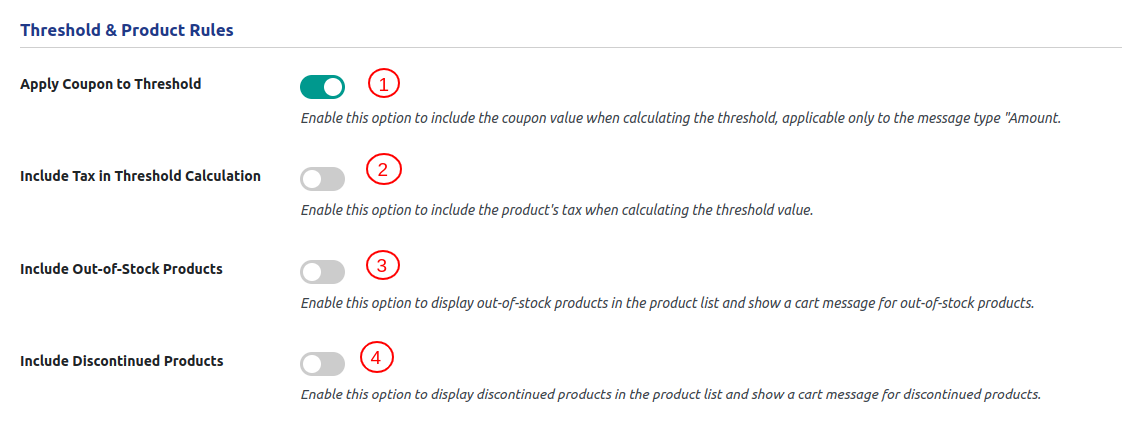
- Threshold & Product Rules:
-
-
-
- Apply Coupon to Threshold: This setting allows you to include the coupon value in the calculation of the threshold for cart messages. It is specifically applicable to message types based on “Amount-Based Message”. If a coupon of $10 is applied and the cart total is $50 before the coupon, enabling this option will adjust the total to $40. As a result, the message will indicate that the threshold has not been met.
- Include Tax in Threshold Calculation: This setting allows you to include the tax amount of products in the calculation of the threshold value for cart messages. If the threshold for the cart message is set to $50, and the cart subtotal is $45 with $5 in taxes, enabling this option will include the tax amount, making the total $50. As a result, the cart message will indicate that the threshold has been met. (Note: To enable this setting, the WooCommerce tax setting must be turned on. )
- Include Out-of-Stock Products: This setting allows you to display out-of-stock products in the product list. This enables the admin to select out-of-stock products and configure a cart message for them too.
- Include Discontinued Products: This setting displays discontinued products in the product list, allowing admins to select them and configure cart messages. Only available if the ‘ Discontinued Products Stock Status’ plugin is activated.
-
-
-
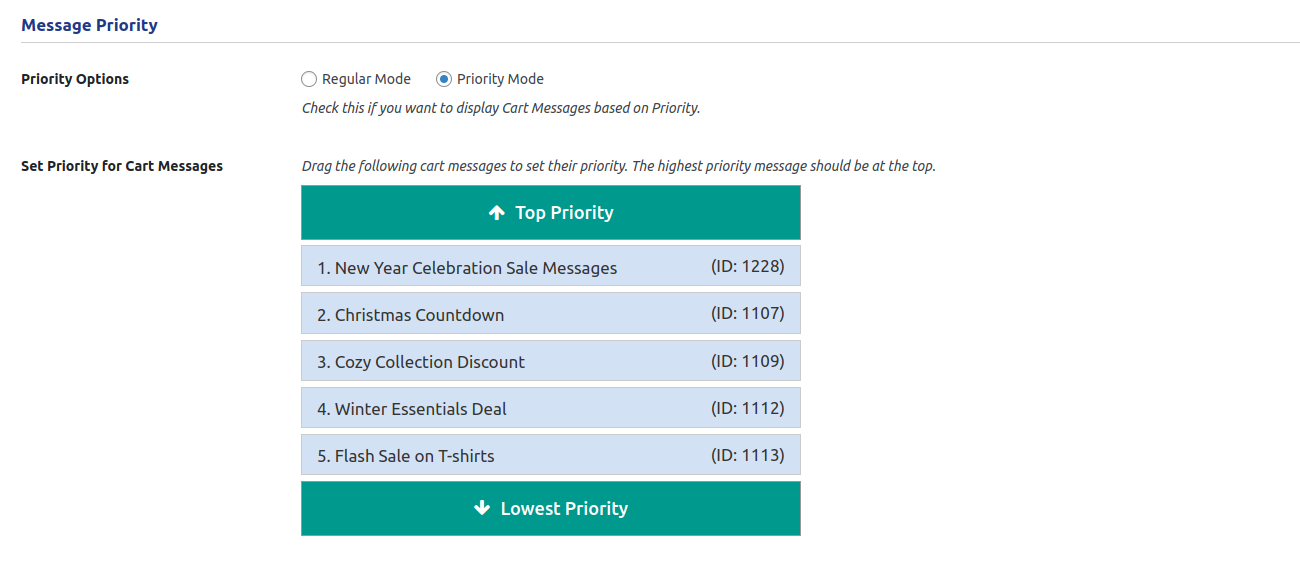
- Message Priority
-
-
- Regular Mode: With this mode, all active Cart Messages are displayed on the Cart Page. Additionally, if chosen, they can also appear on the Product Page and Checkout Page.
- Priority Mode: In Smart Mode, Cart Messages are displayed based on their priority. If a Cart Message has a higher priority than others, it will be displayed until its conditions are met. Once fulfilled, the next Cart Message in the priority order will be shown. Priorities can be adjusted by simply dragging and dropping Cart Messages to set their order.
-
-
- Currency Settings: Here, you can choose whether to show or hide currency symbols in the Cart Message.

-
- Message Styling Settings:
In this section, you can pick the default text color, background color, and the roundness of the Cart Message

-
-
- Background Color: This setting allows the admin to select a background color to customize the cart message background.
- Text Color: This setting allows the admin to select a text color to customize the color of the cart message text.
- Border Radius: This setting allows the admin to customize the border radius of the cart message, giving it rounded or sharp edges as desired.
- Button Background Color: This setting allows the admin to select a background color to customize the appearance of the cart message call to action button.
- Button Text Color: This setting allows the admin to select a text color to customize the call-to-action text in the cart message.
- Button Border Radius: This setting allows the admin to customize the border radius of the call-to-action button, giving it a rounded or sharp appearance.
-
-
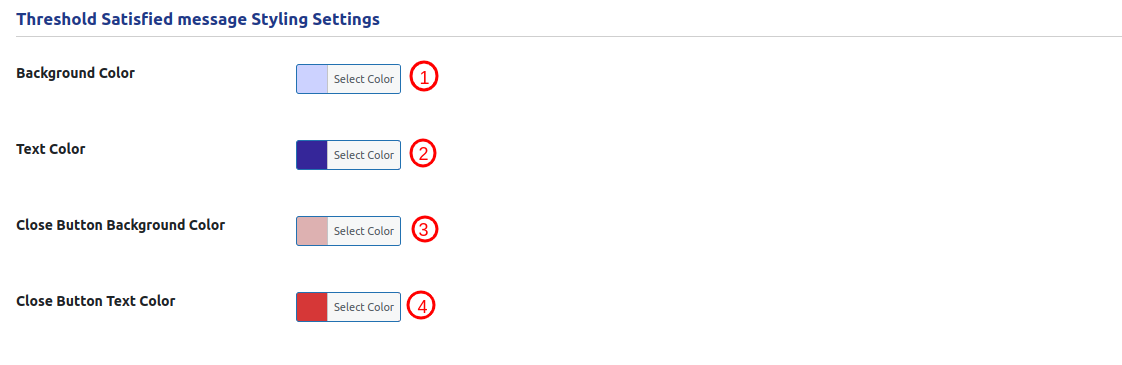
- Threshold Satisfied:
This setting allows the admin to configure the message displayed to users when the cart threshold is satisfied.
-
-
- Background Color: This setting allows the admin to select a background color to customize the cart satisfied message background.
- Text Color: This setting allows the admin to select a text color to customize the color of the cart satisfied message text.
- Close Button Background Color: This setting allows the admin to select a background color to customize the appearance of the cart satisfied message close button.
- Close Button Text Color: This setting allows the admin to select a text color to customize the text in the cart satisfied message.
-
-
- Import/Export Settings:
The Import Export Settings allow users to migrate cart messages between different sites easily.
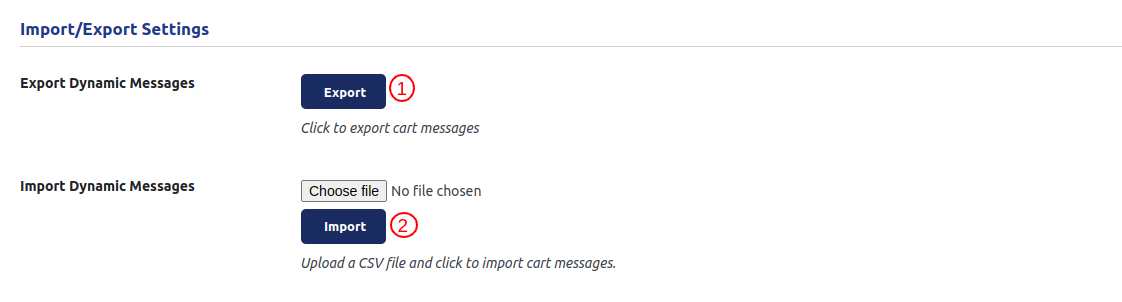
- Export :
- This option enables the export of all draft and published cart messages with a single click.
- The exported data is saved as a CSV file, which can be used for backup or migration.
- Import :
- Upload the previously exported CSV file from another site.
- Click the “Import” button to import the messages into the current site.
Setting Up Cart Message for a Product/Category
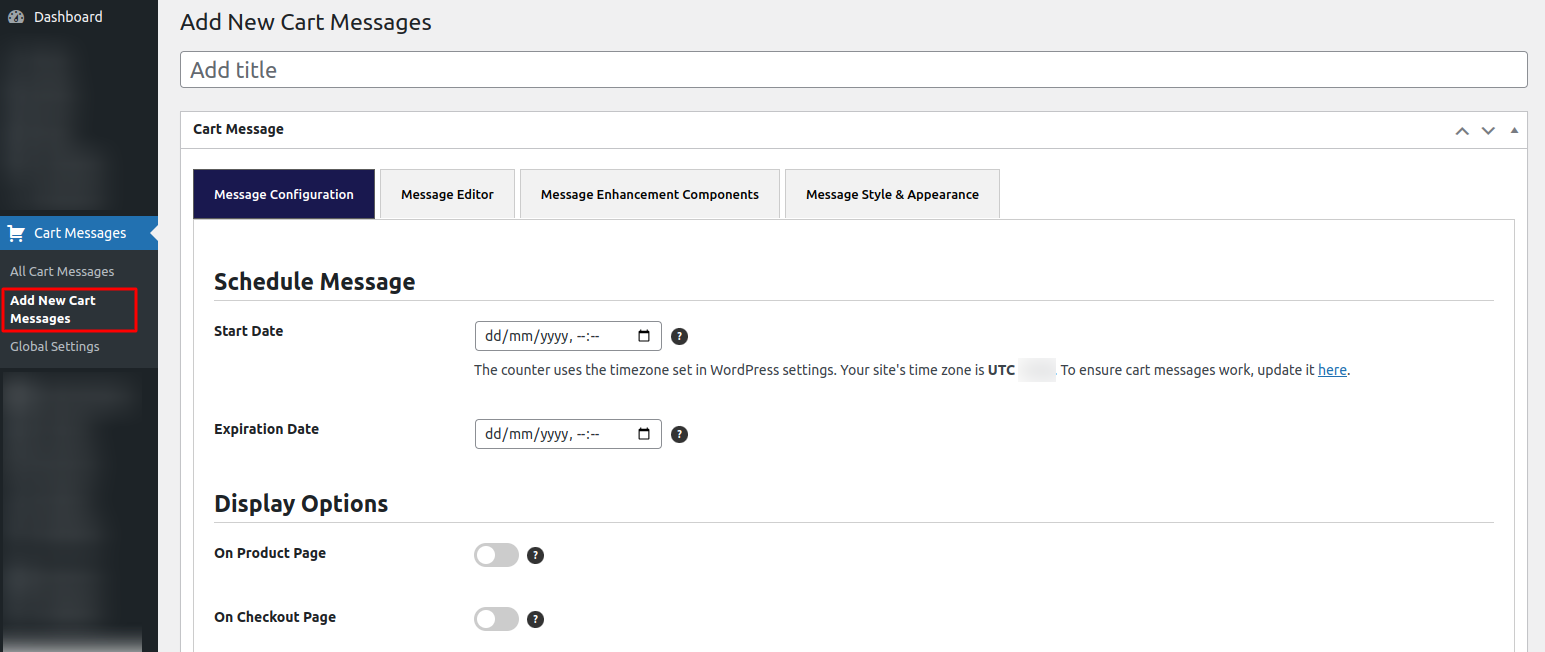
- Click on Cart Messages > Add New or Cart Messages > All Cart Messages> click on the ‘Add New Cart Messages’ button.
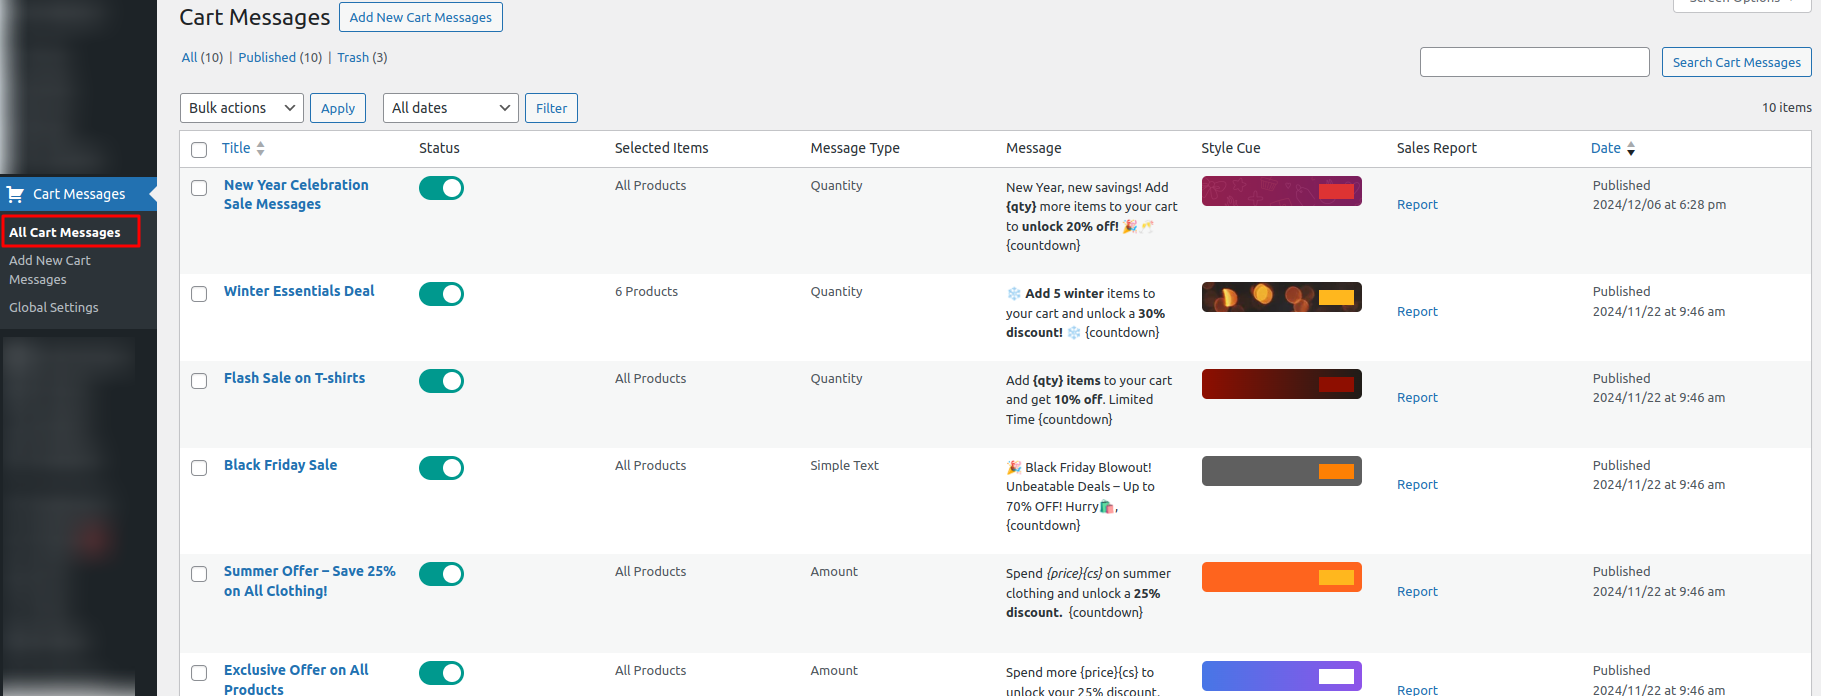
- To view list of all your Cart Message Setting, click on Cart Messages > All Cart Messages where you can see the following columns:
- Title: Displays the set title of the cart message.
- Status: Indicates whether the cart message is active, deactivated, or expired. Admins can directly activate or deactivate the cart message using this toggle.
- Selected Items: Shows the selected categorie, product name (for a single product), or the number of products (for multiple products) selected for the cart message.
- Message Type: Explains the type of message (e.g., amount threshold, product quantity, or a simple notification).
- Message: Displays the initial message text saved for that cart message.
- Style Cue: Provides a visual indicator (like a bar or graphic) summarizing how the message style is configured, offering an abstract preview.
- Sales Report: Sales Report: Includes a clickable link that redirects users to the sales report page associated with the specific cart message. (Available only if the Custom Sales Report Extension is activated.)
- Date: Displays the last published/updated date.
- Add a title for your Cart Message Settings.
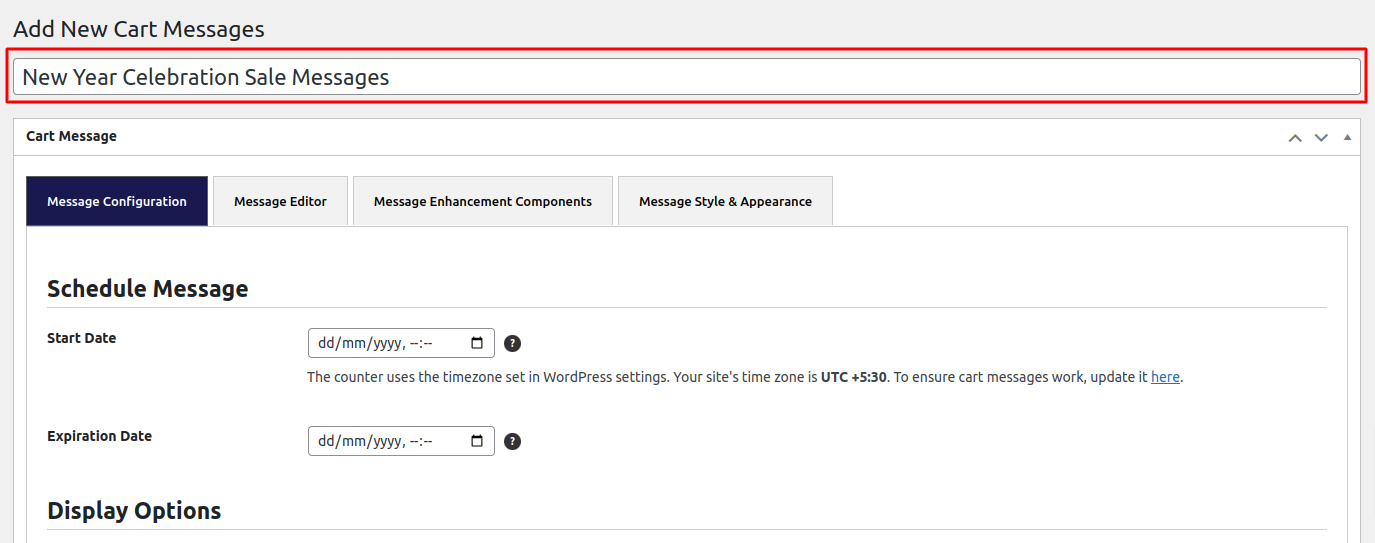
- The cart message configuration is divided into four main tabs for easy setup and customization:

1.Message Configuration
This tab contains options for setting up the basic functionality and logic of the cart message.
-
- Schedule Mesaage : Define the start and end time for the message display.

-
-
- Start Date: This feature allows you to specify both the date and time at which the Cart Message should begin appearing.
- Expiration Date: You have the ability to set the exact date and time when the Cart Message will no longer be displayed.
-
-
- Display Options : Choose where the message will be displayed. By default, the message is shown on the cart page. However, by enabling these options, the admin can also display the message on the product page and the checkout page.

-
-
-
- On Checkout Page: Toggle this option to display the cart message on the checkout page.
- On Product Page: Toggle this option to display the cart message on the product page.
-
-
-
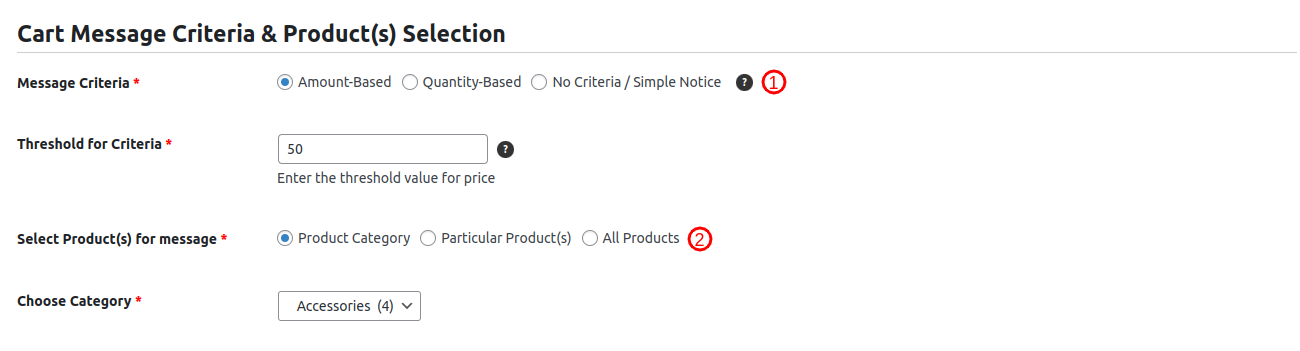
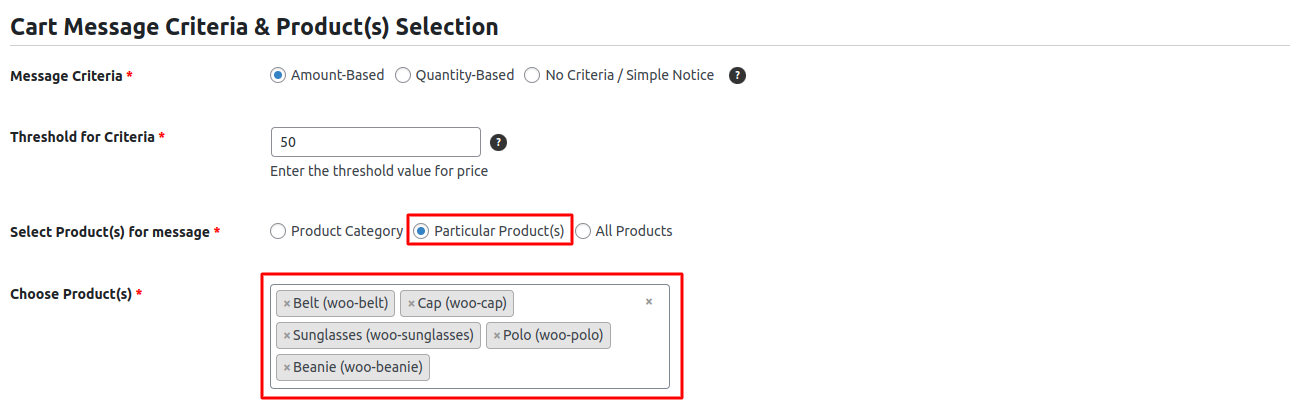
- Cart Message Criteria & Product Selection:
This section allows you to configure where the cart message will be displayed, which products it applies to, and the specific criteria required to satisfy the message.
- Cart Message Criteria & Product Selection:
-
- Message Criteria: This setting allows the admin to choose the type of cart message and whether it is linked to a threshold. The threshold value is set in the Threshold for Criteria field, which determines the required cart amount or quantity needed to trigger the message succession.
- Amount-Based : Displays a cart message that dynamically updates based on the total cart amoun.Suitable for offers like “Add $40 more to get free shipping!”
- Quantity-Based : Displays a cart message that adapts to the changing quantity of items in the cart. Suitable for offers like “Add 9 more items to unlock a 20% discount!”
- No Criteria / Simple Message: This option Creates a static, unchanging cart message with no applicable threshold.
- Show Product(s) for messages: This setting allows the admin to choose when to display the cart message. Options are as follows:
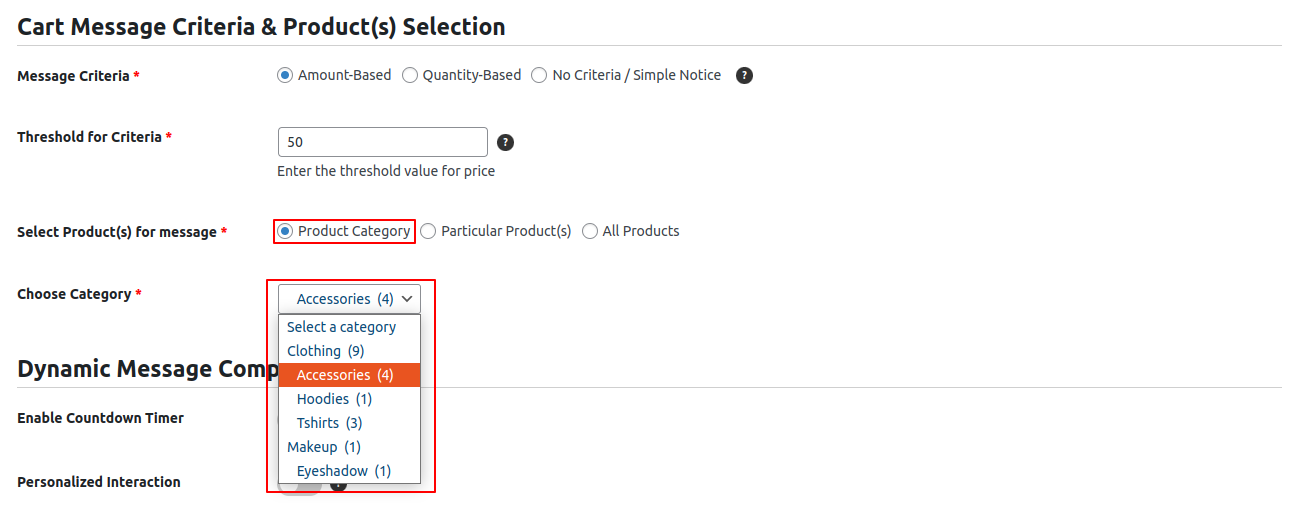
- Product Category: Look for the ‘Choose Category’ dropdown in the next field. It lists all the available product categories. When you choose one, the selected setting applies to all the products in that category.
- Message Criteria: This setting allows the admin to choose the type of cart message and whether it is linked to a threshold. The threshold value is set in the Threshold for Criteria field, which determines the required cart amount or quantity needed to trigger the message succession.
-
-
- Particular product(s) : In the field next to it, you’ll see the ‘Choose Product’ dropdown, which lists all individual products and allows you to select a single product or multiple products.
-
-
-
- All Products : This setting allows the admin to display the cart message for all products in the store. Selecting this option ensures that the message applies universally across the entire product catalog. If the admin has enabled ‘Include Out-of-Stock Products’ and ‘Include Discontinued Products’ in the global settings, the cart message will also be displayed for those products.
-
-
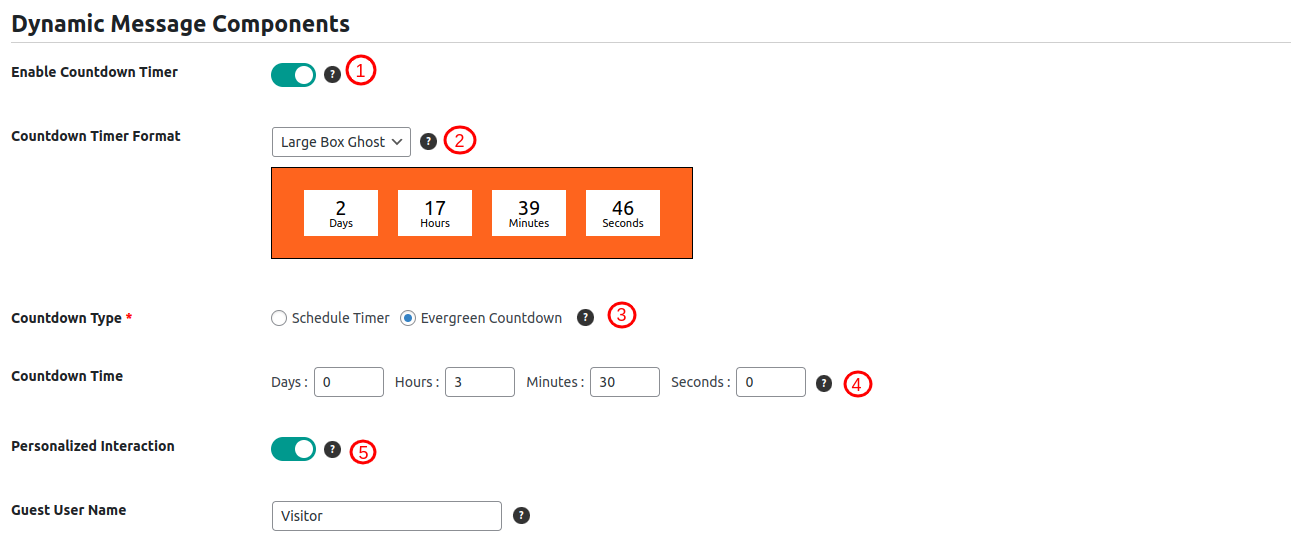
- Dynamic Message Components:
-
-
-
- Enable Countdown Timer: This toggle switch allows you to activate or deactivate the countdown timer.
- Countdown Timer Format: This field provides you with a drop-down menu where you can choose the style for the Countdown Timer. Additionally, a preview of the selected Countdown Timer style is displayed below the drop-down.
- Countdown Type: This field allows you to choose between two types of countdown timers: Schedule Timer and Evergreen Countdown. If you select Evergreen Countdown, an additional field, ‘Countdown Time’, will be displayed.
- Countdown Time: In this field, you can configure the Evergreen Countdown Timer by specifying values in the ‘Days,’ ‘Hours,’ ‘Minutes,’ and ‘Seconds’ input fields.
- Personalized interaction : This field helps to give a personalized message. The {user} placeholder can hold the customer’s name, and for non-logged-in users, a “Guest username” field is provided.
-
-
-
- Message Control:

-
-
- This setting is available for each individual cart message.
- When enabled, it ensures the cart message will not apply to out-of-stock products, even if the global setting includes them.
-
2. Message Editor:
This tab allows you to write and customize the content of the cart message.
-
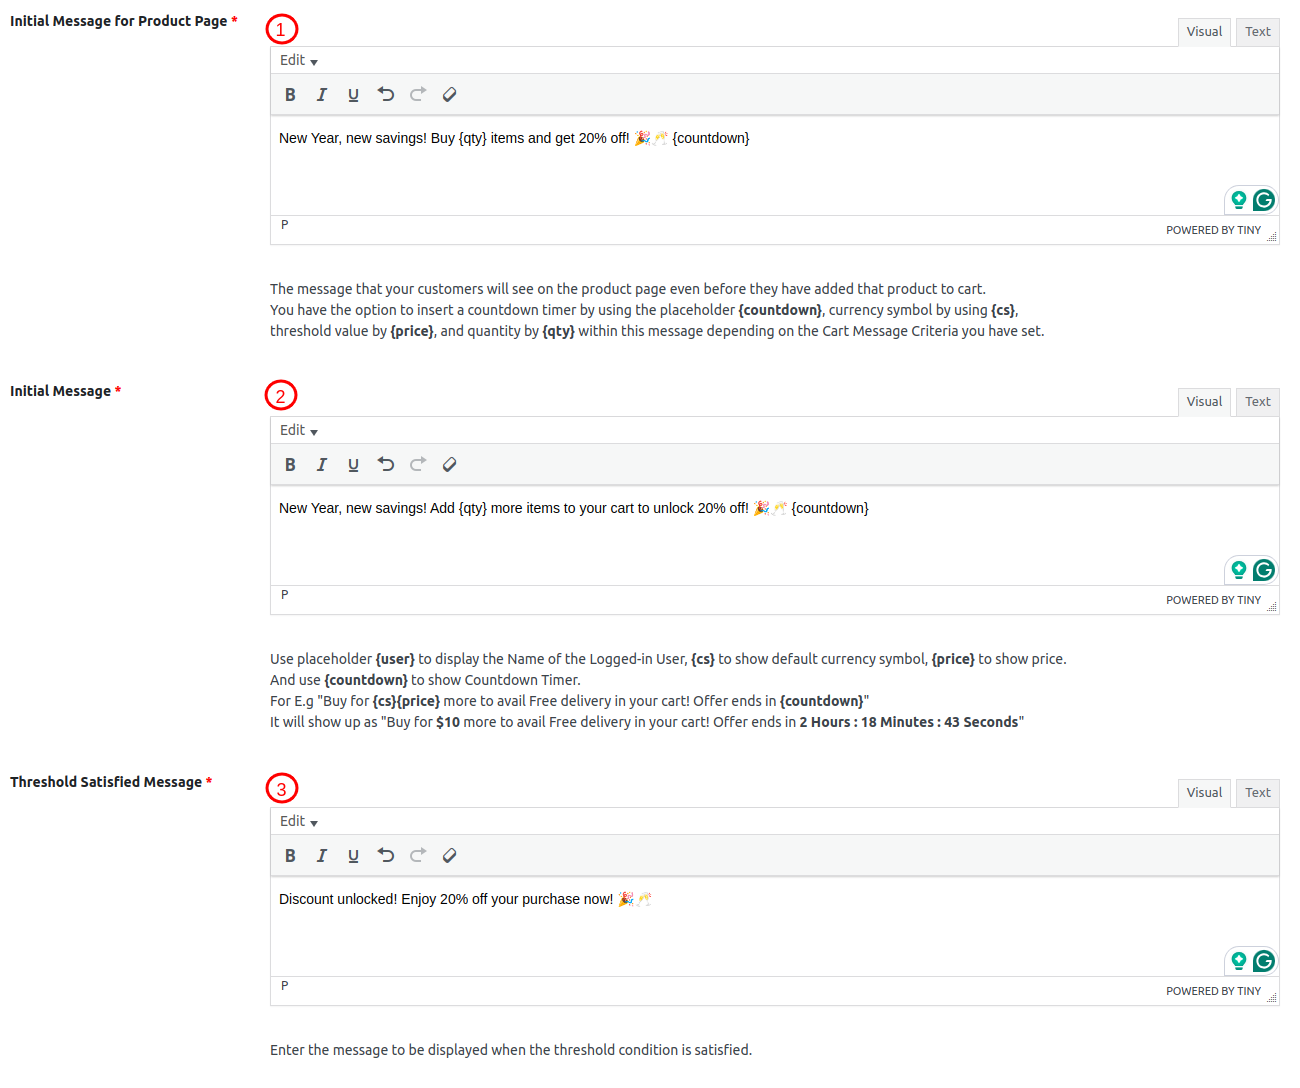
- Initial Message: In this section, you can define the main message that will appear within the cart.This field supports rich text formatting, allowing the admin to highlight text using bold, underline, etc. You can include dynamic content using placeholders such as:
- {cs}: Currency Symbol
- {countdown}: Countdown Timer
- {price}: Dynamic Amount
- {qty}: Dynamic Quantity
- {user} : Add User name / Guest name
- Initial Message for Product Page : Use this field to define the message that appears in the cart message for a product before it is added to the cart on the product page. You can also use placeholders similar to those used for the Initial Message on Criteria Match, such as:
- {cs}: Currency Symbol
- {countdown}: Countdown Timer
- {price}: Dynamic Amount
- {qty}: Dynamic Quantity
- Threshold Satisfied Message: This message will appear when the cart amount or quantity meets the threshold value set by the admin. Like the other fields, this one supports rich text formatting to make key elements stand out.
- Initial Message: In this section, you can define the main message that will appear within the cart.This field supports rich text formatting, allowing the admin to highlight text using bold, underline, etc. You can include dynamic content using placeholders such as:
3. Message Enhancement Components:
This tab helps to enhance the cart message with additional interactive and visual elements.
-
- Message icon: This field grants you the choice to assign an icon to your Cart Message. There are three options for the icon:
- Default Icons: You can choose an icon from the available list of provided icons.
- Message icon: This field grants you the choice to assign an icon to your Cart Message. There are three options for the icon:
-
-
- Custom Icon: Upload your custom icon in jpg, png, or jpeg format, following the provided image size guidelines.
- No Icon: You can also choose the “No Icon” option if you prefer not to display an icon.
-
-
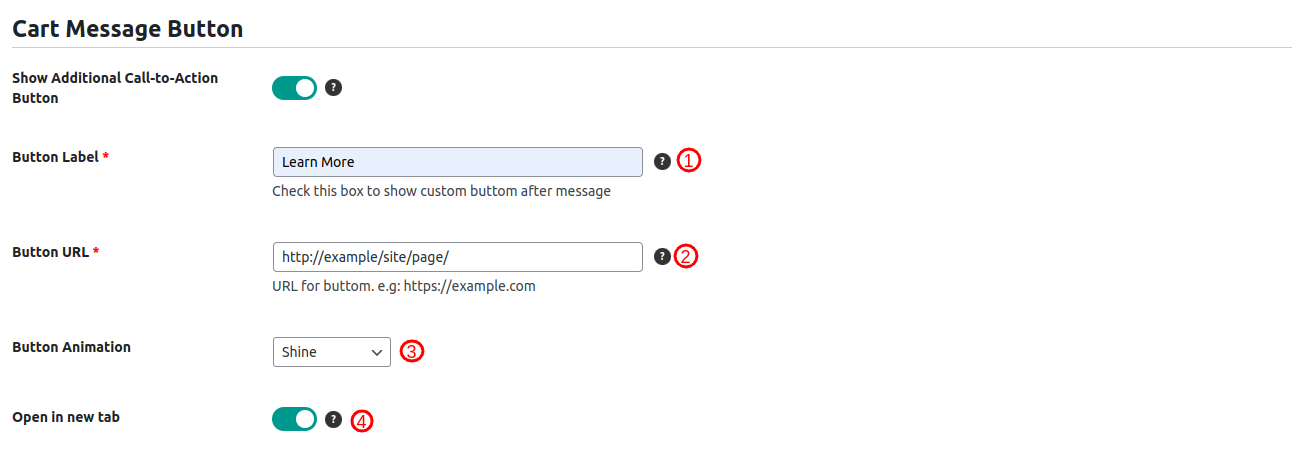
- Call-to-Action Button: This feature enables you to include a button in your Cart Message.
-
-
- Button Label: Here, you can define the text that appears on the button.
- Button URL: Specify the link to which the user will be directed upon clicking the button.
- Button Animation: This setting allows the admin to apply one of 10 different animations to the call-to-action button to capture customer attention effectively.
- Open in new tab: Choose this option if you want the redirected page to open in a new browser tab.
-
4. Message Appearance
-
- Select Style Type: Choose the overall style and theme for the cart message. You have the following options:
- Use Predefined Styles:
A dropdown list of 10 predefined message styles is available. Admins can select one of these styles to apply directly to the cart message. For further customization, admins can enable the “Custom Selected Style for Message” checkbox to modify the selected style as needed.
- Use Predefined Styles:
- Select Style Type: Choose the overall style and theme for the cart message. You have the following options:
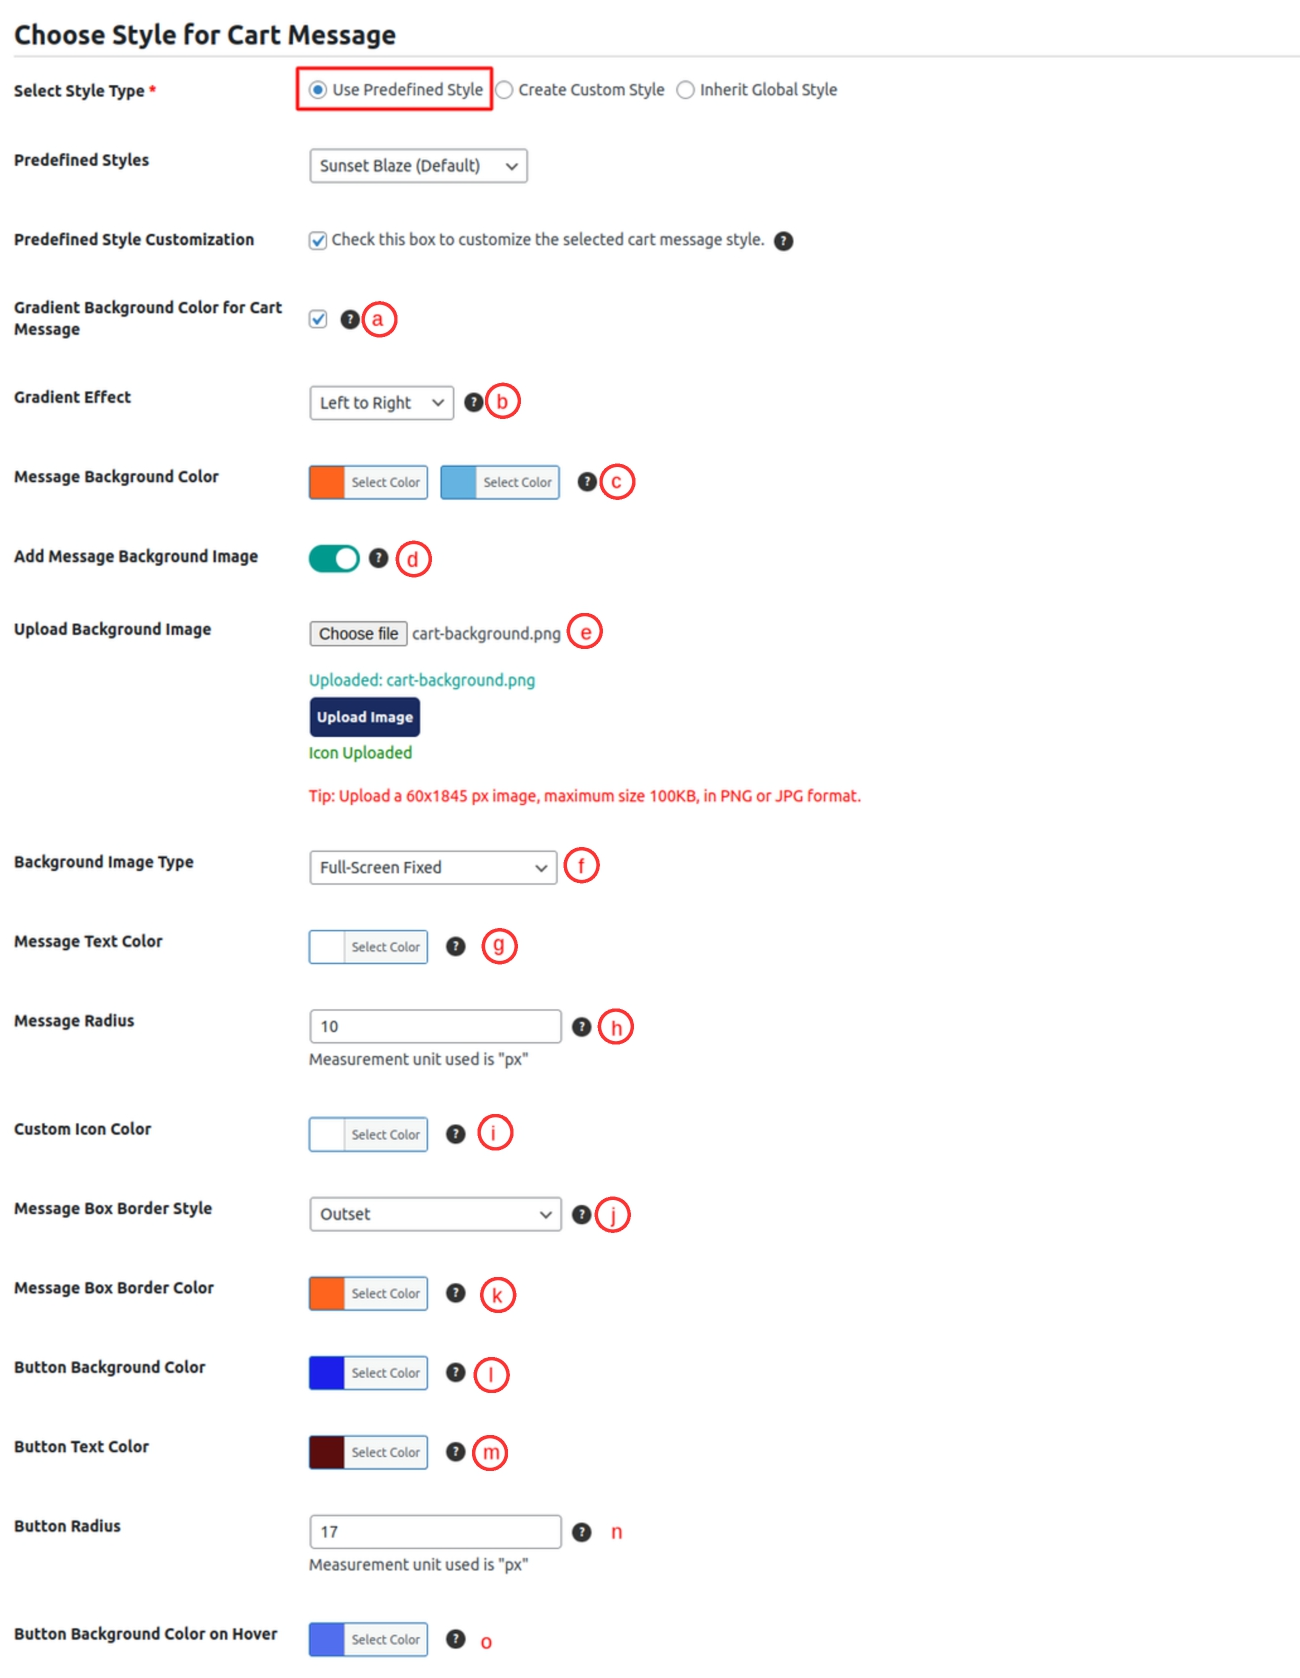
The following fields are available for customizing the cart message style:
-
-
- Gradient Background Color for Cart Message: To add a gradient effect to the background of the Cart Message, you can utilize the “Gradient Background Color for Cart Message” feature. Enabling this option will introduce a dropdown menu for selecting the gradient effect and an additional color selection option for the message background color.
- Gradient Effect: Here you can set the gradient effect of the Cart Message from the three options Top to Bottom, Left to Right, and Diagonal from the dropdown.
- Message Background Color: This field allows you to choose the color of the Cart Message. If the Gradient Background Color for Cart Message is selected then you will get an additional Color field to select the second color for the Gradient Effect.
- Add Message Background Image: Enable this toggle to allow the admin to upload an image as the background for the cart message.
- Background Image: This setting displays an upload file field and an upload button to add the background image.The image should follow the specified dimensions with a maximum size of 100KB, in PNG or JPG format for optimal display.
- Background Image Type: This setting allows the admin to choose how the background image will fit within the cart message. There are three options:
- Full-Screen Fixed and Stretch: Expands the image to fill the entire cart message area, scaling it to fit.
- Full-Screen Fixed: Displays the image at its original size, without scaling or tiling.
- Tiled: Repeats the image across the entire cart message area to create a tiled effect.
- Message Text Color: Use this field to define the color of the text within the Cart Message.
- Message Radius: Adjust the roundness of the Cart Message edges using this field.
- Custom Icon Color: Set a custom color for Font Awesome Icons displayed on the Cart Message.
- Message Box Border Style: Add a border style to the Cart Message. If you select an option other than “None” from the dropdown for border style, a new field labeled ‘Message Box Border Color’ will appear.
- Message Box Border Color: This field is used to specify the color for the border of the Cart Message.
- Button Background Color: Use this field to set the color of the button.
- Button Text Color: Define the color of the text displayed on the button using this field.
- Button Radius: Adjust the roundness of the button’s edges with this field.
- Button Background Color on Hover: Specify the color for the button’s hover effect in this field.
-
-
- Create Custom Style:
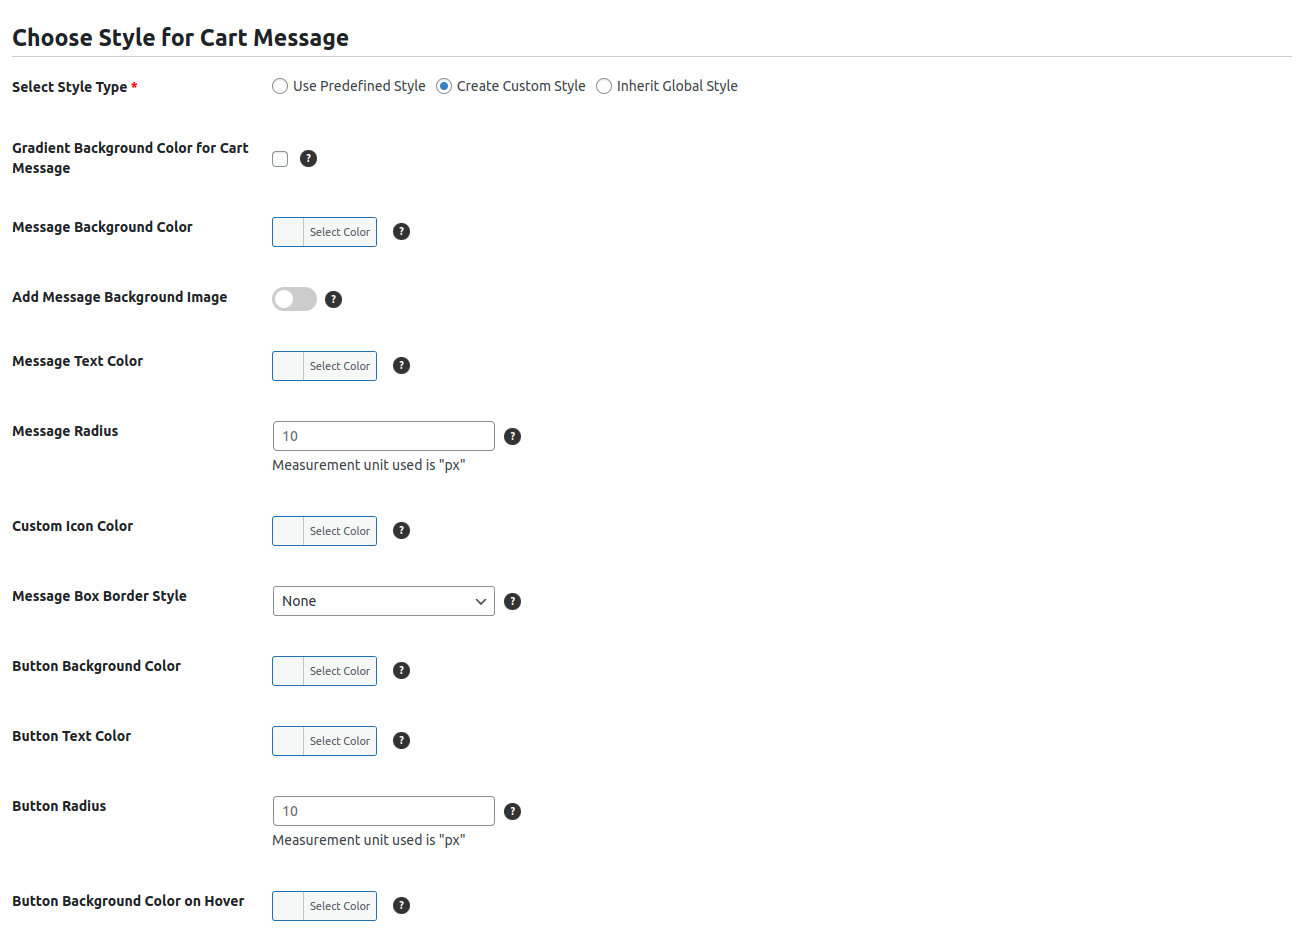
If the Select Style Type is set to “Custom Style”, you unlock a variety of customization options for personalizing the design of your cart message.
-
- Defaults to Global Style: Initially inherits settings from the Global Style.
- Same Style Fields as Predefined Style: Includes all the style fields available in the Predefined Style option, providing flexibility for modifications.
- Full Customization: Allows admins to adjust or rebuild the style entirely from scratch, creating a unique and tailored design.
-
- Inherite Global Style: This option inherits the global settings and directly applies them to the cart message without additional customization.
-
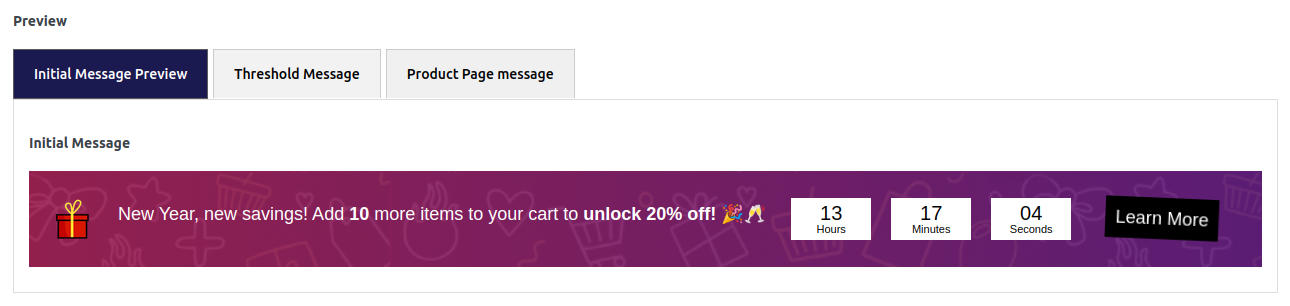
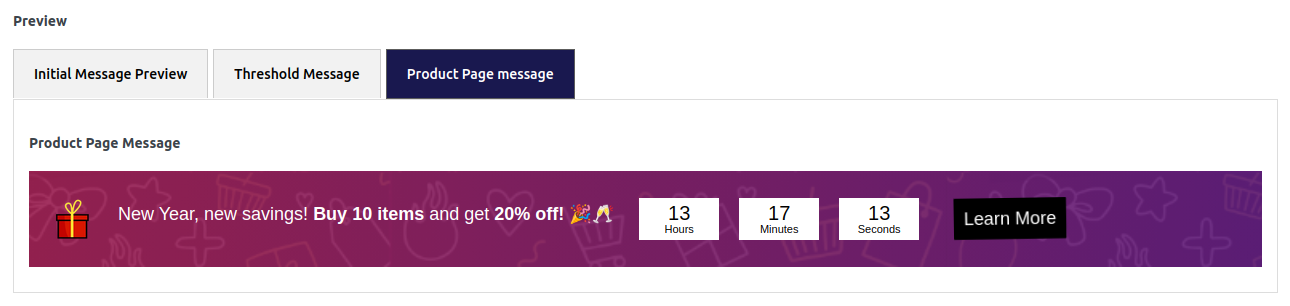
- Preview: The Preview section allows admins to review how their cart messages will appear to customers. If you’ve overlooked any mandatory fields, this action will trigger an alert notifying you of the missing information. Following are the preview tabs:
- Initial Message
- Preview: The Preview section allows admins to review how their cart messages will appear to customers. If you’ve overlooked any mandatory fields, this action will trigger an alert notifying you of the missing information. Following are the preview tabs:
-
- Threshold Satisfied Message

-
- Product Page Message
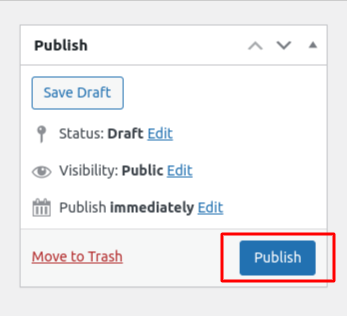
Once the Message is configured Click on publish button to publish it.
Once the cart message is published, if the admin wants to temporarily disable the cart message, they can use the ‘Enable Cart Message‘ toggle to turn it off. When turned off, the cart message will not be displayed. This setting is only available for published cart messages.

Cart Message Examples:
- Elegant Accessories: Purchase 3 Women’s Jewelry Items for 20% Off!
- Accessorize Your Style: Buy Any 4 Pieces of Jewelry and Get 10% Off!
- Jewelry Upgrade: Get 25% Off on Any 2 Statement Necklaces!
- Sparkling Savings: Buy 3 Pieces of Jewelry and Enjoy a 15% Discount!
- Weekend Glamour: Save 20% on Women’s Dresses – Sale Closes on Sunday!
- Elegant Accessories Sale: Save 25% on Women’s Handbags – Hurry, This Deal Ends Soon!
- Spend $100, Get 25% Off Your Entire Purchase – Offer Ends at Midnight!
- Step Out in Style: Spend $90 and Save 30% on Women’s Shoes – Hurry, This Offer Won’t Last!
Setting Shortcode to Display Cart Message
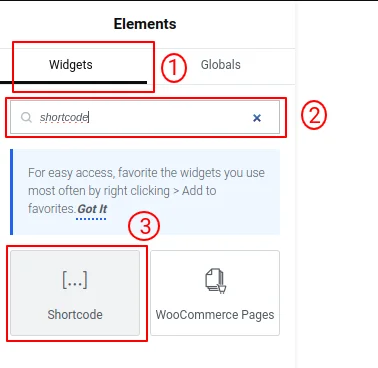
- In Elementor, open the cart page template where you want to add the shortcode. Navigate to the “Widgets” panel on the left-hand side.
- Search for the “Shortcode” widget in the search bar.
- Drag and drop the “Shortcode” widget to the desired location on your product page.
If the cart message is not visible on your site due to template customization or the use of any other builder, you can use our shortcode. There are three shortcodes available to display messages on different pages:
- [dcm_product_page] for the product page
- [dcm_cart_page] for the cart page
- [dcm_checkout_page] for the checkout page
We have provided an example below of how to implement the shortcode on a cart page using the Elementor theme.
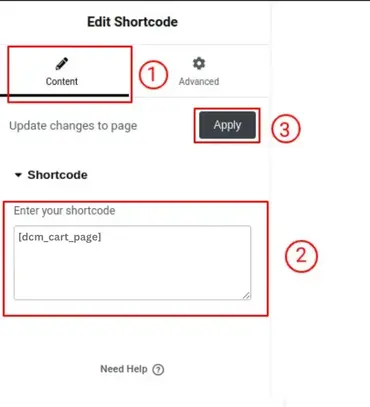
- Once you’ve added the “Shortcode” widget to your desired location on the cart page template, click on the widget to open its settings.
- In the ‘Content‘ tab of the “Shortcode” widget, you’ll see a field where you can input your shortcode. Paste or type [dcm_cart_page] into this field.
- After adding the shortcode, click ‘Apply‘ (or ‘Update’ if you’re done with all changes) to save your changes and ensure the shortcode is correctly applied to the block. And publish the cart page.