Artificial intelligence (AI) is transforming the world of e-learning, and one of the most powerful tools for creating engaging and interactive learning experiences is ChatGPT. ChatGPT is a chatbot that uses natural language processing (NLP) to generate human-like text on various topics.
It is based on OpenAI’s GPT-3.5 model, which is one of the most advanced NLP models in the world. In this guide, you will learn how to use OpenAI and ChatGPT models with LearnDash AI, the best learning management system (LMS) for WordPress.
You will discover how to create course content, scenarios, quizzes, and more with the help of AI and automation. You will also learn how to integrate ChatGPT into your LearnDash AI courses and how to customize its appearance and behavior.
By the end of this guide, you will be able to harness the power of AI for your e-learning platform and create a futuristic and fun learning environment for your students.
Automation and AI are transforming the field of e-learning, offering various benefits for both educators and learners. Some of the benefits are:
- Faster course development: AI can help educators create courses faster by automating tasks such as content creation. This saves time and resources for educators and allows them to focus on more creative and supportive aspects of teaching.
- Round-the-clock assistance: AI can provide learners with 24/7 support and guidance through chatbots, and assistants. These AI agents can answer questions, provide feedback, and offer resources based on the learner’s needs and preferences.
- Personalized content: AI can tailor the learning content and activities to suit the individual learner’s profile, performance, and progress. This ensures that learners receive the most relevant and optimal instruction for their learning goals and styles.
- Intelligent tutoring systems: AI can simulate one-on-one tutoring by providing personalized and adaptive instruction, feedback, and remediation. These systems can monitor the learner’s performance, identify areas of difficulty, and adjust the difficulty level and pace accordingly.
AI is a powerful tool for e-learning, and LearnDash AI experts and teachers are always exploring new applications of it. But you can also use AI in your LearnDash AI LMS in these ways:
- Predictive Analytics for Learner Success: Utilize predictive analytics powered by AI to identify learners at risk of falling behind. By analyzing historical data, the system can flag potential challenges, allowing instructors to intervene and provide targeted support.
- Chatbots for Learner Support: With the help of LearnDash customizations, Integrate AI-driven chatbots to provide instant learner support. These virtual assistants can answer common queries, offer guidance on course navigation, and provide real-time assistance, enhancing learner engagement and satisfaction.You can enhance this experience further by incorporating a LearnDash chat plugin to facilitate seamless communication between students and instructors.
- Automated Assessment and Feedback: Use AI to automate the grading of assessments and quizzes. Implement intelligent assessment tools that not only evaluate answers but also provide detailed feedback, aiding in the continuous improvement of learner understanding.
Here’s an example of Integrating OpenAI into LearnDash
Let’s say you are a teacher. And you want a way for your students to address their questions regarding a topic in a particular course. To achieve this, we will provide them with a form with a section where the student can describe their issue.
Our AI assistant, ChatGPT, will then understand the problem and provide pre-trained responses accordingly. At the end of the conversation, the student will be given the option to indicate whether they are satisfied with the answer or not. If they select “NO”, ChatGPT will redirect the issue to the teacher of that course.
We will be using Uncanny Automator to connect the LearnDash to OpenAI. While using any form plugin will suffice, this is necessary because we will be taking input for the ChatGPT command from the form itself.
Additionally, integrating LearnDash adaptive learning techniques can further enhance the e-learning experience. By personalizing the learning path based on individual performance and engagement, educators can ensure that each student receives tailored content that meets their unique needs.
We will be going through 2 main steps of creating a recipe to connect LearnDash to OpenAI
Setting up recipe and connecting Gravity form to the Automator
Step 1: Configuring the Automator plugin.
Assuming you have already downloaded and activated the Uncanny Automator plugin, it’s time to configure it.
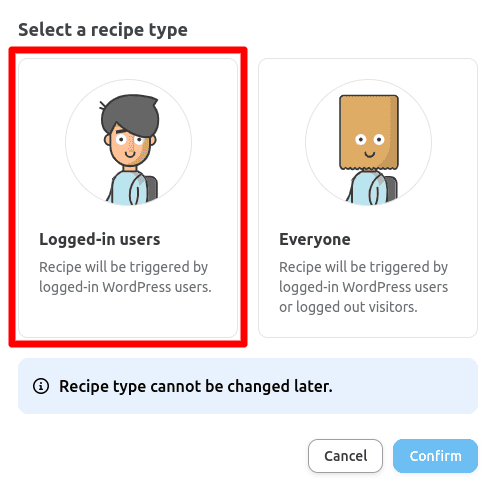
In the WordPress dashboard click on Add New in the Automator. A pop-up will appear asking you to choose which type of recipe you want.
A recipe is a way of automating tasks on your WordPress site by connecting triggers and actions. A trigger is something that happens on your site like a user submitting a form or completing a course. An action is something that you want to happen as a result, like sending an email or enrolling a user in a course.
You have two options- Logged-in users through which only the logged-in WordPress users will be able to use the recipe. Second is Everyone where anyone irrespective of whether they are logged in or logged out, can access the recipe. You need to select the logged-in users option.
Step 2: Naming your recipe
Now since you have an idea of what a recipe is, you need to name the recipe you will be creating.
For this blog, we will name it ‘OpenAI LearnDash Course’.
Step 3: Creating a form
You need to create a form with simple sections to take input from the student. This form will act as the input to trigger the OpenAI to give the required solution.
We will be using the Gravity Forms plugin to create a form. You may use other form plugins that are compatible with Uncanny Automator.
After your form is done, it should look somewhat like this:

Step 4: Select the Form plugin integration
Now, its time to connect the form which we created to the Gravity Forms integration.
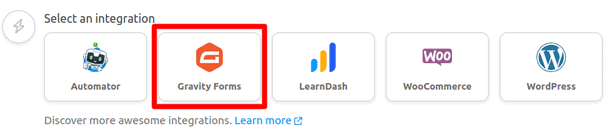
Below the Recipe title, you will find a meta box named Trigger. This trigger will make sure to take the input from the student.
In the triggers panel, you need to choose the form-building plugin that you have used to create the form. Since we used a Gravity Form, we will select the Gravity Forms integration.
By leveraging the LearnDash AI capabilities, you can further enhance the student experience and support LearnDash adaptive learning strategies. This allows your courses to dynamically adjust based on individual learner needs and progress, optimizing their educational journey.
Integrating a LearnDash chat plugin will also significantly enhance the learning experience by facilitating real-time communication between students and instructors. This means that as students navigate through the course, they can ask questions and receive immediate assistance, further enriching their learning process.
Step 5: Configure the form plugin.
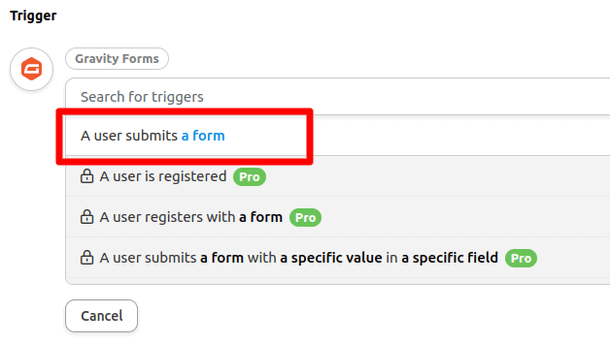
After selecting the Gravity Forms integration, you need to expand it and select the option “A user submits a form”. This ensures that you can connect the Gravity Form you created with the trigger you just created.
Step 6: Select your created form.
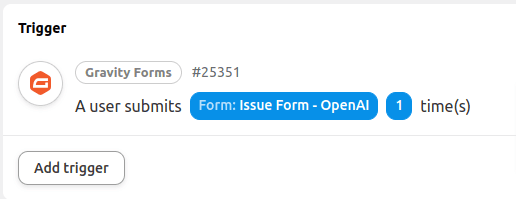
Now, after clicking a user submits a form, the Automator will prompt you to select a form. Since you had already created a form beforehand, you can select that form and click save.
Your trigger has been successfully created.
Finding it difficult to integrate OpenAI into your LarnDash site?
Consult Our Learndash experts today!
Connecting Gravity form with OpenAI.
Step 1: Configure the Primary Action.
Now you need to set up your Action. An Action is basically the result that will be given after a student submits the form.
Click on the Add action in the Action panel. You will be shown a panel of available integrations from which you select OpenAI.
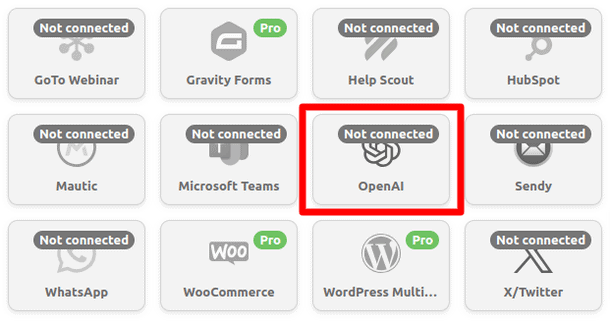
Since it is showing Not connected, you need to connect the OpenAI.
Once you click the OpenAI integration, you’ll be shown 2 options, First, sign up for the Uncanny Automator, and second, connect your OpenAI account.
Sign-in to the Uncanny Automator and your 1st step is done. To connect your OpenAI account, you must fill in the secret key generated by your OpenAI account. Once you do these 2 steps, OpenAI integration will be shown connected.
Step 2: Configure OpenAI.
In this step we will be connecting the Gravity form to OpenAI.
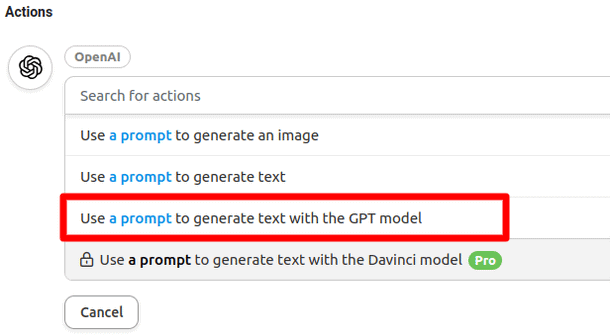
Once you click the OpenAI integration, you will be shown a dropdown from which select “Use a prompt to generate text with the GPT model” or the Davinci model if you have a pro version.
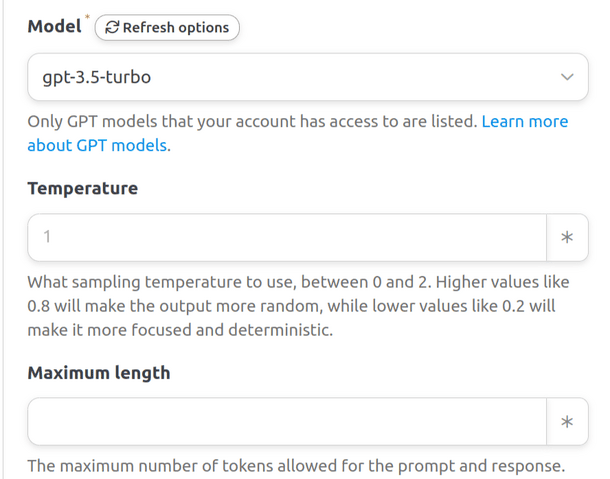
The Automator will present you with an editor where you can configure the information that it will pass along to OpenAI.
Now since ChatGPt will be the one answering the questions, we need to configure its basic settings which are Temperature and Maximum length.
Temperature defines how creative your answer should be while Maximum length refers to the number of tokens OpenAI has. A token is a small piece of text that represents a common sequence of characters. For example, the word “token” is one token, but the word “tokenization” is two tokens: “token” and “ization”. Generally, one token is about four characters.
The Documentation here will explain everything you need to know about tokens.
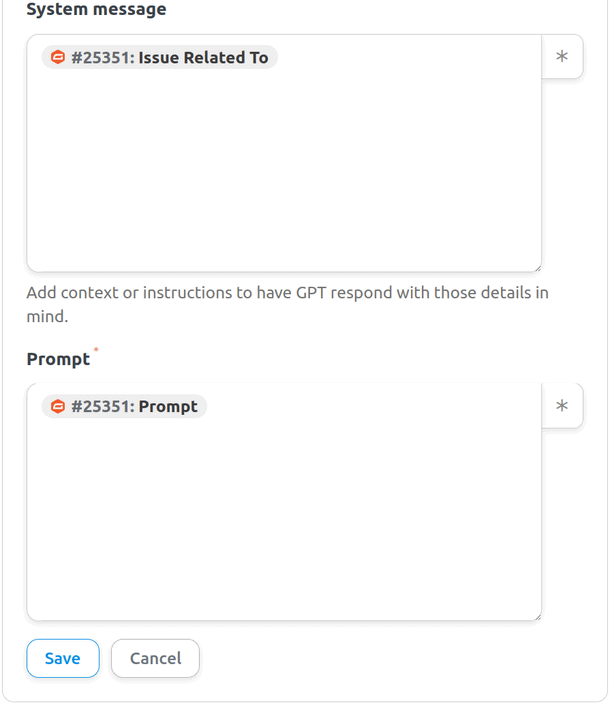
To configure Automator tokens, click on the Asterisk which you’ll see on the right of your screen, and select the respected token.
Using all Automator tokens, we’ve filled the required fields.
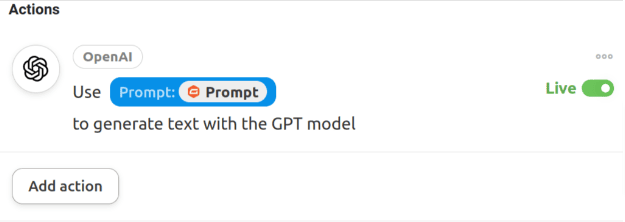
Step 3: Save your actions.
Finally, after you have filled all the required fields, click save and your action should look like this.
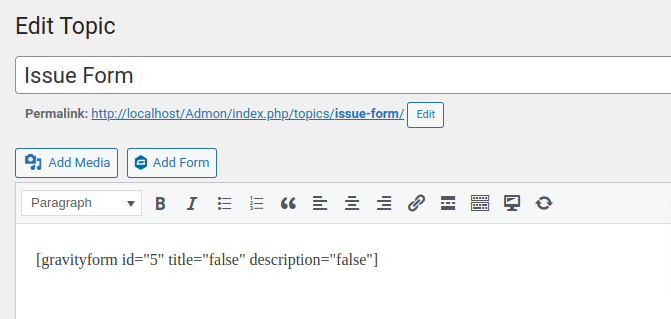
Now we will see how to render the form to the student. Once you have created a form, a shortcode for the form will be generated. For example, “[gravityform id=”5″ title=”false” description=”false”]” is the shortcode of our form. Each form has a unique ID associated with it.
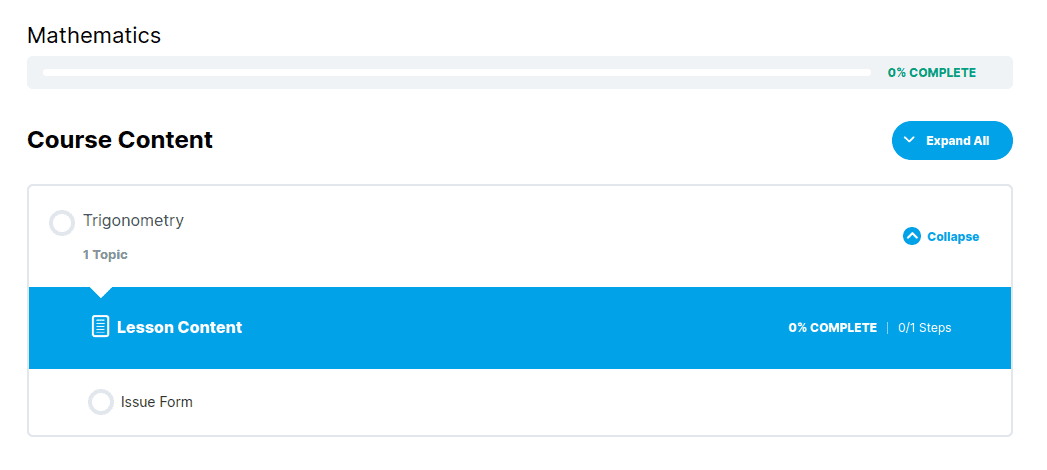
Once you have your form shortcode, you need to create a topic for your lesson where the form will be displayed. In the text editor of the Topic, paste the shortcode and you are done.
Now in your course, you can add this form as a new lesson. After you are done it should look something like this.
By incorporating LearnDash adaptive learning strategies, you can enhance the responses generated through OpenAI, tailoring them to meet the diverse needs of your learners. Additionally, utilizing a LearnDash chat plugin will allow for real-time interactions, providing students with immediate access to support and enhancing their overall learning experience.
Integrating LearnDash AI capabilities within your course can make the automation process smoother, allowing for more personalized learning experiences.
If you are not sure how to create a Gravity Form and embed it in a course, you can reach out to our Gravity Forms Expert.
Recommended reading- “Automate Your Course Management Tasks with LearnDash”
Wrapping Up!
In this article, we have seen how to use OpenAI and ChatGPT with LearnDash to create engaging and interactive e-learning experiences. By using these tools, we can leverage the power of LearnDash AI to automate and enhance our course content and provide our learners with a personalized and dynamic learning environment.
Implementing LearnDash adaptive learning techniques allows us to tailor educational experiences to meet the diverse needs of our students, while a LearnDash chat plugin offers real-time support and engagement. The future of e-learning is bright, with the collaborative synergy between LearnDash and AI paving the way for a transformative and efficient learning journey for both educators and learners alike.