Communication plays an important role in the success of any elearning platform. With LearnDash, you can keep your students informed through timely email notifications. Doing this can significantly enhance their learning experience.
Today I will guide you through the process of sending and customizing bulk LearnDash email notifications for students. We will be using the ‘Student Email Notifications for LearnDash’ plugin. Let’s begin!
Benefits of Setting Up LearnDash Email Notifications
- Improved Communication: You can share course updates, deadlines, and announcements with your learners. This boosts engagement and keeps them on track.
- Enhanced Engagement: Automated reminders can motivate learners to engage with courses and content.
- Timely Feedback: You can notify learners about quiz results, assignment submissions, and course progress. This feedback is timely and helps them understand their performance.
- Increased Accountability: You can remind learners of deadlines, lessons, and assignments. This can reduce procrastination and boost course completion rates.
- Customized Messaging: It enables tailored emails based on user actions or progress. Thus, communication becomes more relevant and effective.
- Improved Learner Experience: You must ensure your learners get important updates. They shouldn’t have to check the course platform constantly.
- Easy Tracking: You can keep an eye on your talks with learners. This is useful for seeing how engaged they are and fixing any problems.
- Enhanced Course Management: Automated notifications help instructors and admins manage courses better.
- Boosts Course Retention: Regular updates and reminders can keep learners engaged. They will be more committed to completing their courses.
Student Email Notifications for LearnDash
Reminders play a crucial role when students forget to complete quizzes, courses, or assignments. However, why limit yourself to reminders alone? Imagine being able to provide notifications for pending assignments, congratulate students on achievements, or update course content. These personalized LearnDash emails ensure that no student goes unnoticed.
Unfortunately, LearnDash doesn’t offer these features out of the box. That’s where the “Student Email Notification for LearnDash” plugin comes in. With this plugin, you can send tailored email notifications to students—celebrating their victories when they ace a quiz or gently reminding them about pending assignments.
With the “Student Email Notification for LearnDash” plugin, you’re not just bombarding students with emails. Each notification is smartly filtered. For instance, you can use placeholders like {Student_name} to address specific students and {course_name} for their current course.
Another cool feature of this plugin is- as an admin, you can restrict backend access for group leaders and instructors. They can create, schedule, and send LearnDash notifications directly from the front end.
Additionally, this plugin seamlessly integrates with ‘Assignment Deadlines Pro for LearnDash.’ You can track deadlines, identify late submissions, and send targeted notifications. Even if students are enrolled in multiple courses, you can reach them all with personalized LearnDash email notifications.
Now it is time to get into the working of Student Email Notifications for LearnDash
We understood what the “Student Email Notifications for LearnDash” plugin does.
Now we will deeply understand how the plugin works.
Once you download the plugin, you need to upload the plugin. So go to your WordPress Dashboard. Click on Add New Plugin and upload the plugin.
Creating Student LearnDash Notifications
After you have installed the plugin, the ‘Student Notifications’ menu will be available in your WordPress dashboard.

Now, click on ‘Add New’ to create your student notification.
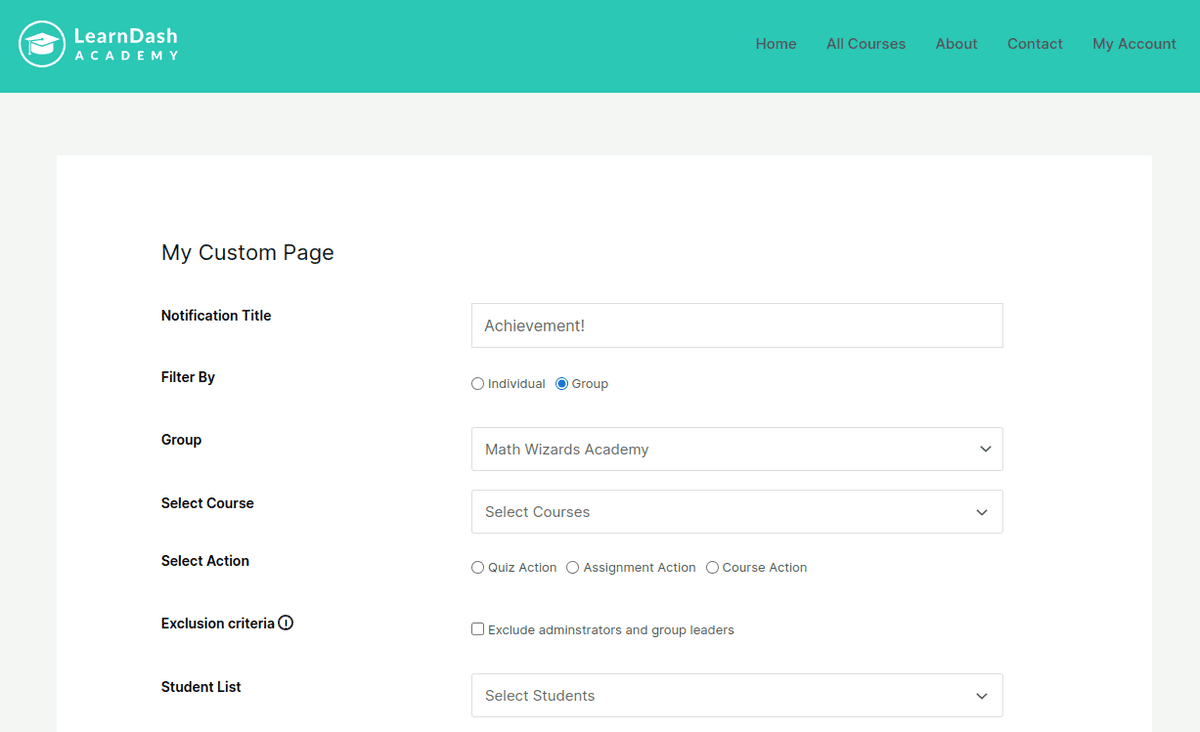
To send email LearnDash notifications to your students, you will have to choose between ‘Individual’ and ‘Group’. I will explain how both of them work.
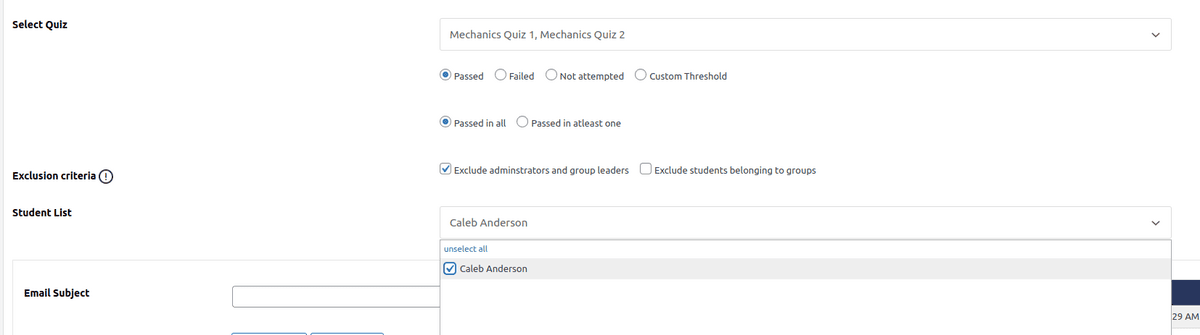
You can choose the ‘Individual’ filter if you want to send personalized LearnDash notifications to individual students.
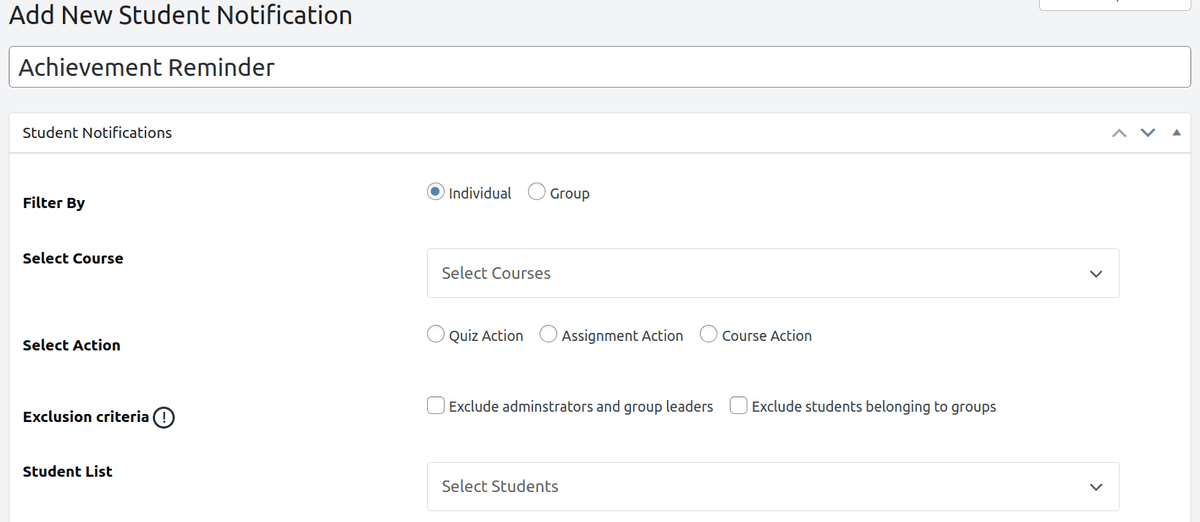
In the Select Courses section, you can select the course in which the student got an achievement. Here you can select multiple courses.
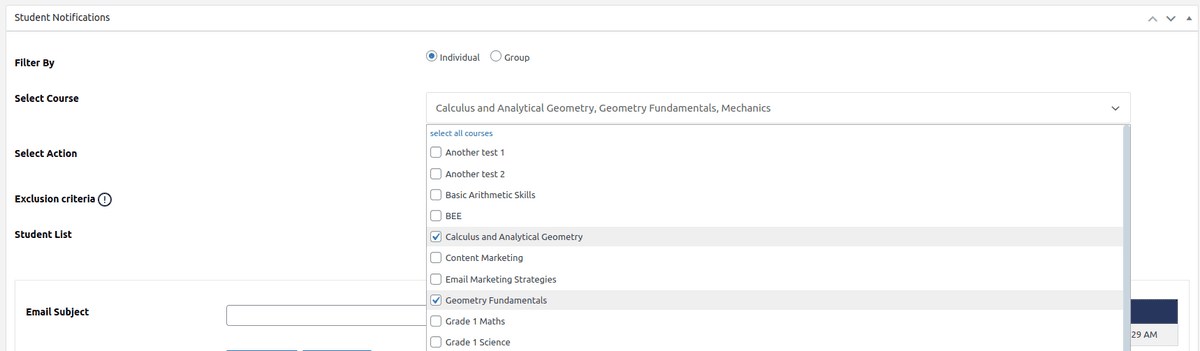
Now, you need to select the Action type. You can choose from ‘Quiz Action’, ‘Assignment Action’, and ‘Course Action’ depending on where the student got the achievement. I’ll be choosing the ‘Quiz Action’.
After this, you need to choose the quiz that the student completed. Again, you can select multiple quizzes.
Next, select the radio button depending on the criteria you want. Do the same for Exclusion Criteria too. Here, you can exclude the group leaders that are part of that group.
If you find the set up confusing, you can reach out to a LearnDash developer to help you out.
Now, we will do the same for the ‘Group’ filter.
First, choose the group from which you want to select the students.
In the Select Courses, select the courses. Again, you can choose multiple courses. Then select the Action- Quiz Action, Assignment Action, and Course Action.
Depending on the Action selected, you can select the further options. Refer the below image for better understanding.
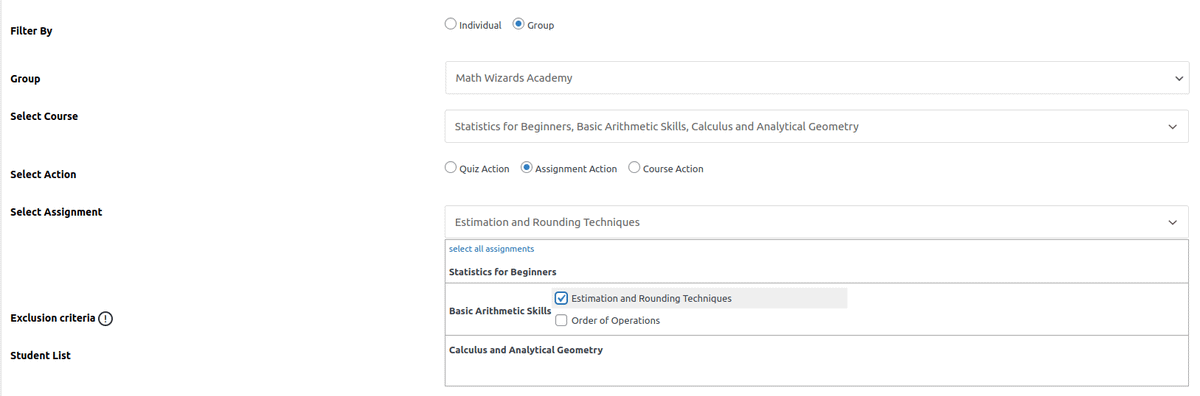
You can choose the Assignments from the selected course.
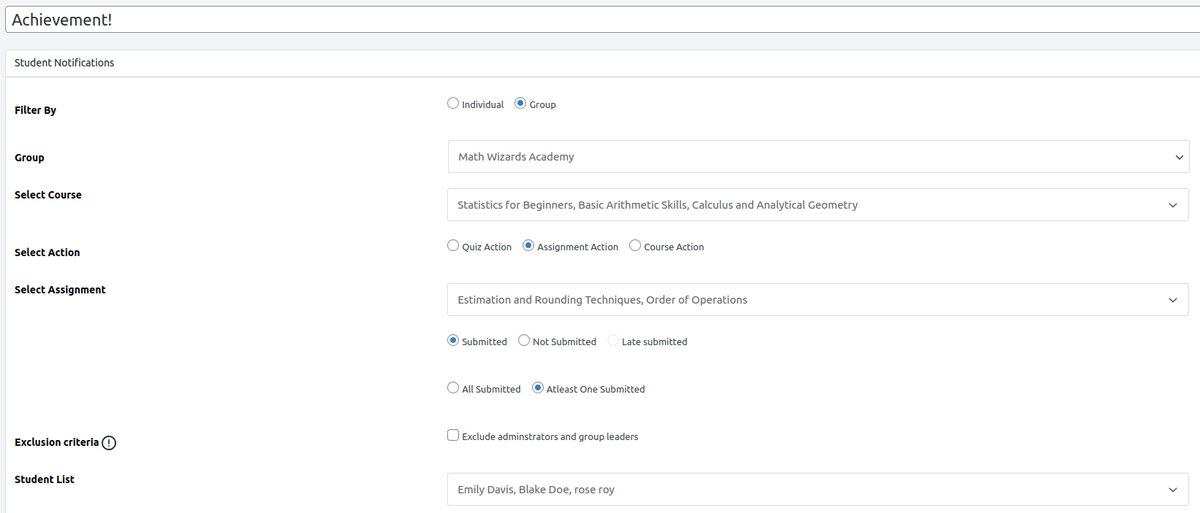
Once done, it should look like this.
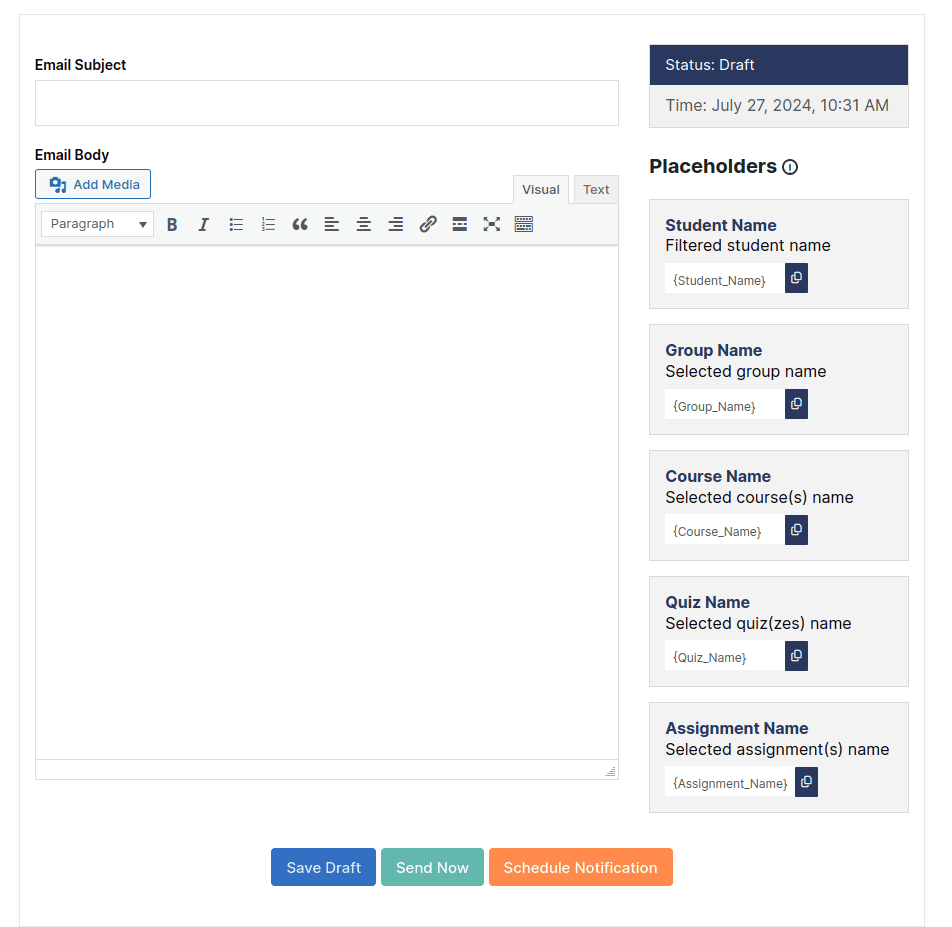
We are done with shortlisting the students based on our specific criteria. Now, it is time to set up the email notification that we are going to send.
Managing Student LearnDash Notifications
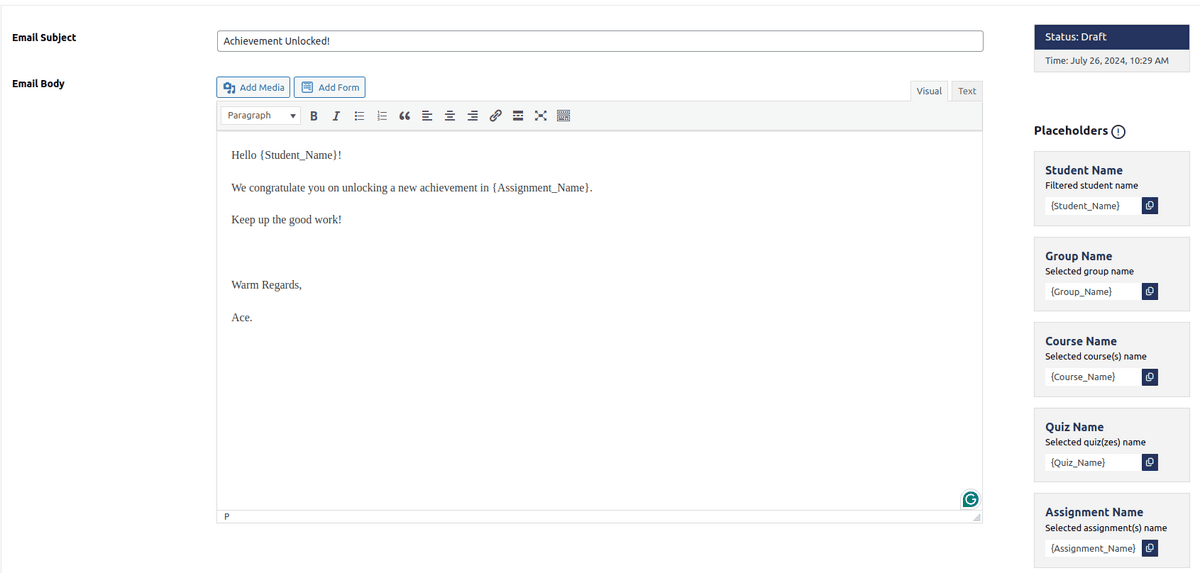
After we are done shortlisting the students we want to send the LearnDash notifications, we can fill in the email details.
As you can see, we can use the placeholders to personalize the message for each student. These placeholders will dynamically change the value for every student, like {Student_Name} for students name, {Group_Name} for the group they are in, {Course_Name} the course they are enrolled in, {Quiz_Name} for quizzes and {Assignment_Name} for assignments.
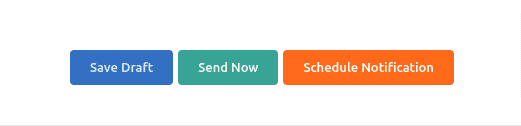
Once you are done filling out the email details, you can choose if you want to send the email directly to the students, or if you want to save it as draft, or you can even schedule the email.
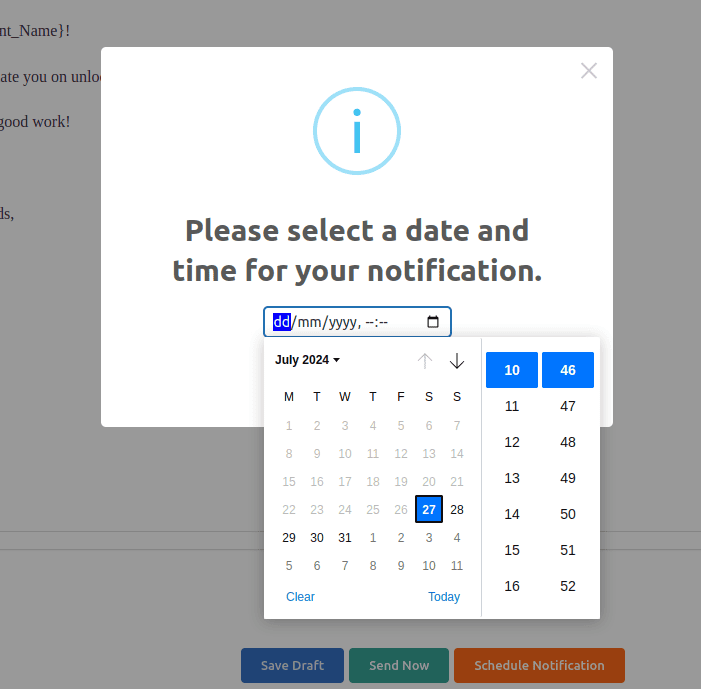
This is how it would look like when you choose to schedule the email.
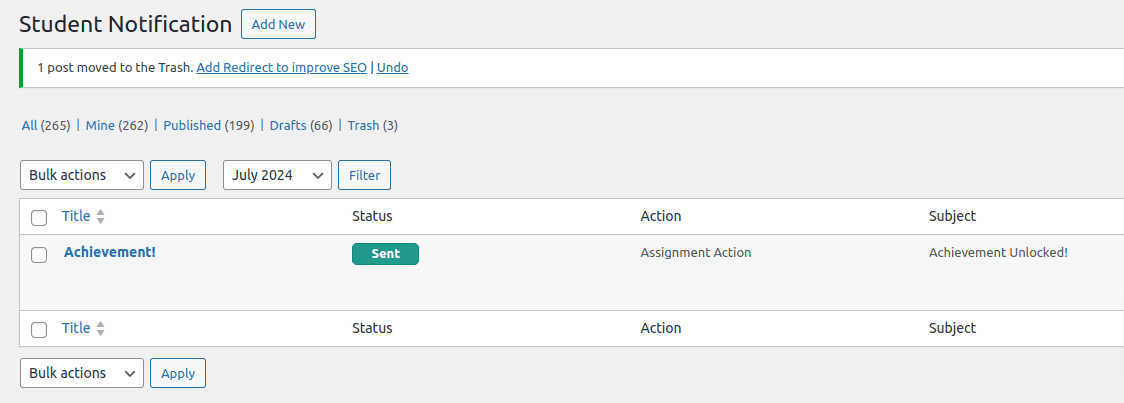
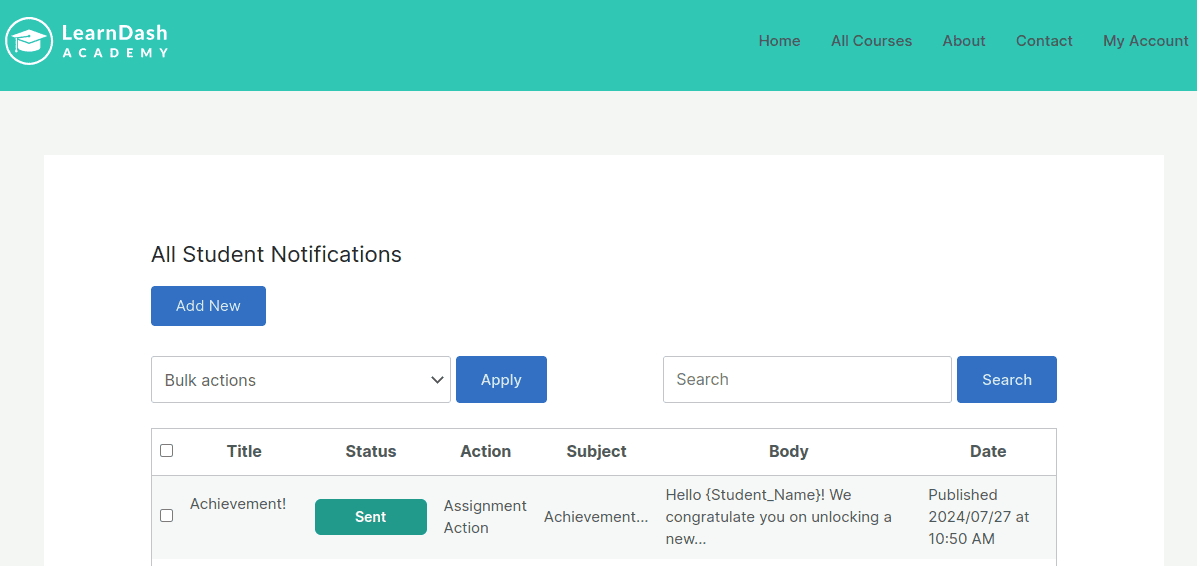
We chose to send the email directly. The email should be popped up in the Student Notification menu.
If you want a custom email template to be used to send emails you can opt for LearnDash custom development to do it for you.
We are done with setting up student email notifications.
Another cool feature of the ‘Student Email Notifications for LearnDash’ plugin is that your educators, group leaders can create, send, and schedule LearnDash notifications right from the frontend. They don’t need to have the access to your backend.
This is what it looks like from the frontend.
The entire process from creation to sending of emails is exactly same as we did in the backend.
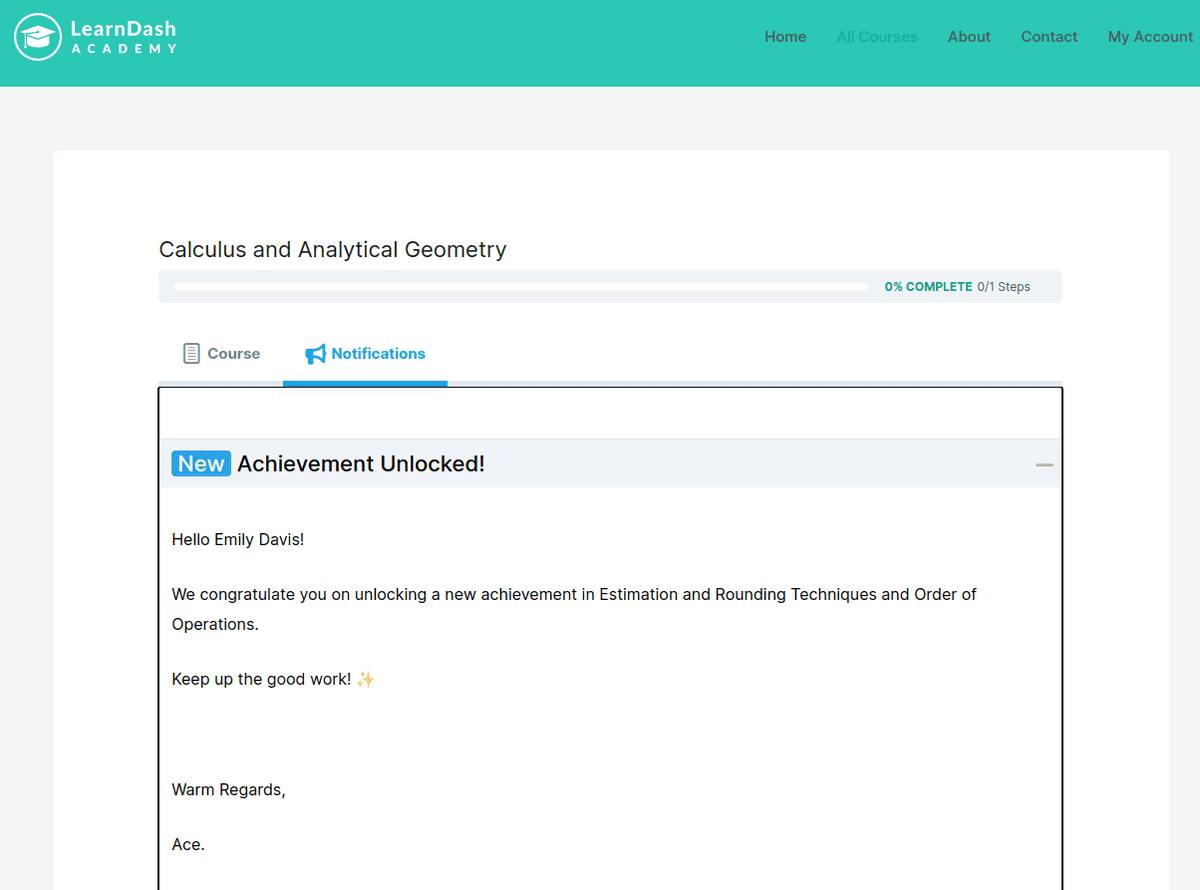
Additionally, your students can view the email through their front end.
I hope you understood the complete setup of ‘Student Email Notifications for LearnDash’ plugin. If you have any questions related to this topic, feel free to contact us.
Wrapping Up!
In this blog, we understood the customization and sending of LearnDash email notifications through the ‘Student Email Notifications for LearnDash’ plugin.
Initially, you have to choose from ‘Individual’ and ‘Group’ filter. Then you select the Group from which you want to shortlist the students. Then select the next criteria and at the end, you’ll get the students shortlisted.
Next, we customized the LearnDash notification that we are going to send through emails. You can personalize each email using placeholders.