If you run an online store using WooCommerce, you might need to export your orders for various reasons. For example, you might want to share your order data with your team, your suppliers, your shipping partners, or your accounting software.
Exporting orders can also help you analyze your sales performance and optimize your store operations. But how can you export orders from WooCommerce in a simple and efficient way?
In this blog, we will guide you through ten easy steps to export WooCommerce orders using the Advanced Order Export for WooCommerce plugin. So let’s get started.
Why Do You Need to Export WooCommerce Orders?
Exporting WooCommerce orders is a pivotal practice for online store owners, offering a myriad of benefits that contribute to streamlined operations and informed decision-making. Firstly, order exports provide a comprehensive snapshot of your sales history, aiding in financial analysis, inventory management, and strategic planning. With a detailed record of transactions, you can identify trends, track product performance, and optimize your inventory to meet customer demand effectively.
Furthermore, exporting orders is essential for accounting purposes. By having a well-organized, easily exportable dataset, you simplify the reconciliation process, making it more efficient for bookkeeping and financial reporting. This not only saves time but also reduces the likelihood of errors associated with manual data entry. This is especially valuable for WooCommerce plugin developers looking to optimize and enhance e-commerce functionalities.

Exporting WooCommerce orders comes in handy in case of data loss, due to a site crash. By exporting order data, you can retrieve it later. For WooCommerce customizations, the process is equally vital, allowing you to tailor reports based on specific criteria such as products, customers, or metadata. If you are looking for a custom-tailored reports plugin, you can always opt for custom WooCommerce development.
Another critical aspect is customer relationship management. The ability to export customer information associated with orders allows you to build targeted marketing campaigns, personalize communication, and enhance the overall customer experience. Understanding the buying patterns and preferences of your clientele becomes more accessible, fostering customer loyalty and satisfaction.
How to Export WooCommerce Orders
Install and activate the plugin
In your WordPress dashboard, go to the plugins section > Add New, and install and activate the “Advanced Order Export for WooCommerce” plugin.
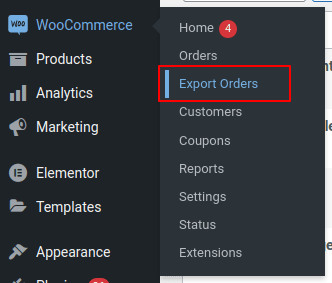
Access the Export Orders
Once you have activated the plugin, a new ‘Export Orders’ tab will be added to the WooCommerce sub-menu.
This ‘Export Orders’ will take you to the settings page of Advanced Order Export for WooCommerce.
Click on that to begin, and we will move on to the next step.
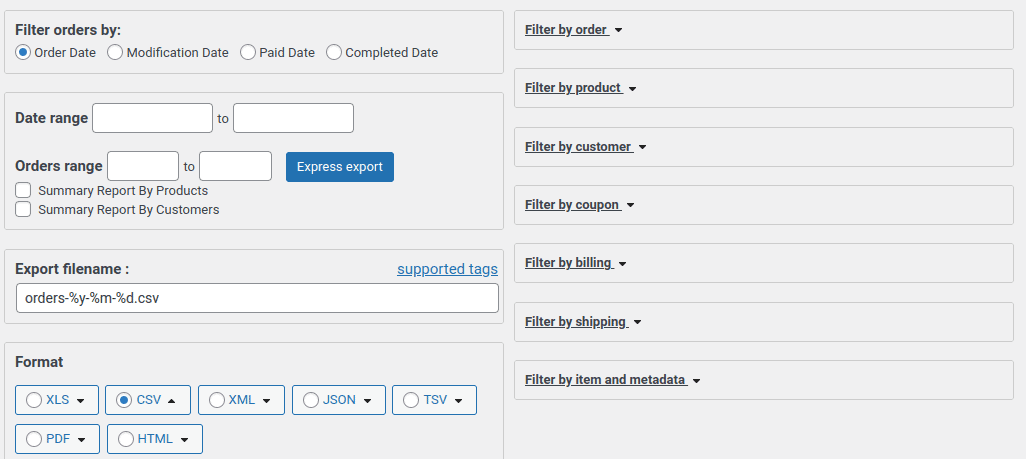
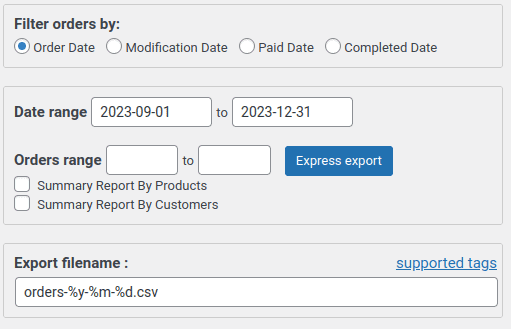
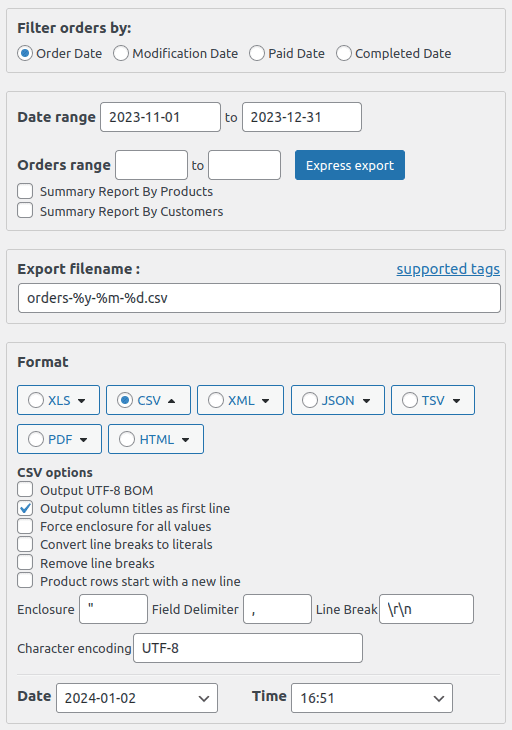
Set filters for the date ranges
In this step, we will be checking out the filter orders and setting them by date.
When you click the ‘Export Orders‘ tab, an ‘Export now’ field will be shown, consisting of the ‘Filter orders by’ option.
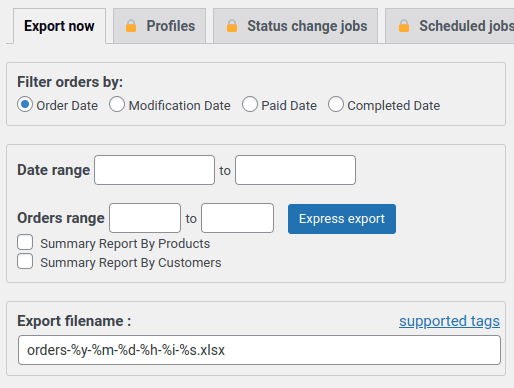
You can select from a range of available filter options such as:
- Order Date
- Modification date
- Paid Date
- Completed Date
You may select any of these options according to your needs to generate the report. For this blog, we will be filtering the dates by order, so select the ‘Order Date’ option.
Date and Order range options
In this step, you will be specifying the range of dates your products were ordered. Once you enter the dates range and order range and export your orders, only these orders will appear in your report.
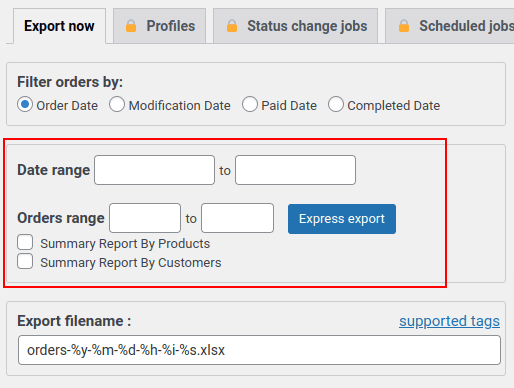
The Summary Report by Products and the Summary Report by Customers options will generate additional sheets in your export file that show the aggregated data of your orders by products or customers.
The summary report by products will show you the total quantity and amount of each product sold in your orders, as well as the average price and percentage of the total sales. The Summary Report by Customers will show you the total number and amount of orders placed by each customer, as well as the average order value and percentage of the total sales.
‘The Export filename‘ provides you with an input field for how your file should be named. For example, the orders export file will be named ‘orders-%y-%m-%d.xlsx’, and it will look like this- ‘orders-2024-01-02.xlsx’.
To know more about this, you can check out the documentation.
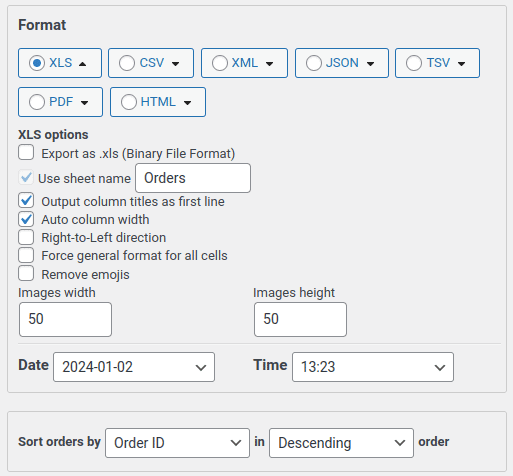
Select the File Format
In this step, we will select the format of the file we want to export our orders into. There are 7 file format options available.
The Format section offers fields for:
- XLS
- CSV
- XML
- JSON
- TSV
- HTML

Format XLS options
From the below option you may choose any file format in which you want your report to be exported.
For the purpose of this blog, we will be exporting our report into XLS format.
Once you click on the file format, a dropdown will appear showing you multiple format options.
Need a Custom WooCommerce Export plugin for your site?
Get in touch with our WooCommerce Experts!Filter Export even further
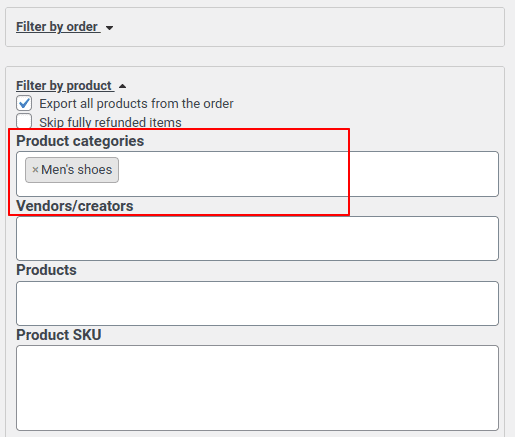
Suppose you want a report based on particular products or by shipping methods, you can customize your report by applying different filters. Next to the Date and Order range options, you’ll find 7 ‘Filter by’ options.
- Order
- Product
- Customer
- Coupon
- Billing
- shopping
- Item and metadata
Expand the filter option
Let’s say you want a report based on orders in the men’s shoe category, you must expand the ‘Filter by product’ option. Enter the category to be searched and that’s it!
You have the option to add more specifications for each file format. For instance, in the case of CSV format, you could specify auto-column width, force general format for all cells, image width and height, and so on. However, please keep in mind that these choices will be determined by the specific characteristics of each format.
If you are finding it confusing, or need any assistance, you can always reach out to us. Our WooCommerce Experts are always ready to help.
Time to Export!
There are a plethora of other settings to configure, so feel free to play around with those.
Once you are happy with your export settings, you’ll find the ‘Export’ button at the bottom of the window.
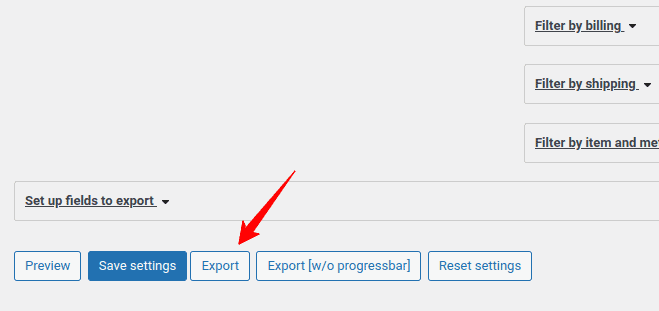
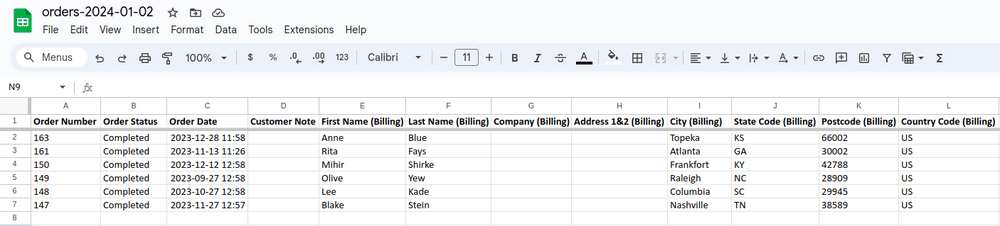
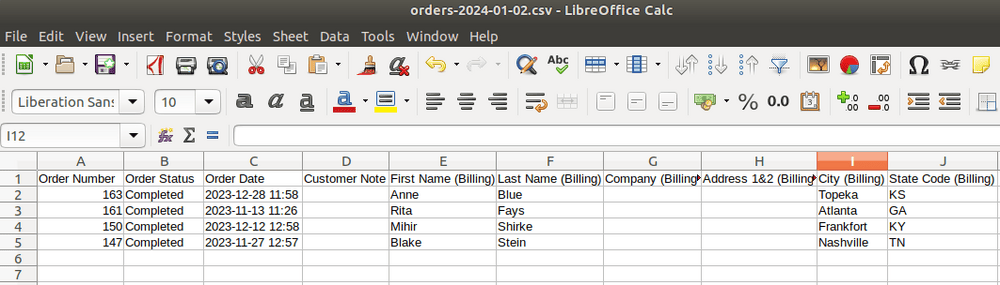
The WooCommerce export orders XLS file will be saved on your computer, where you can open it and see the list of all orders with their order numbers, statuses, and billing and shipping information from the customers.
Change file format
You can always go back to the export page and change the file format to any other file you want your report into.
Let’s say you want to share a file with data separated by commas, so we export the report into CSV format.
For print purposes, you mostly need the PDF format, as to store it on a website, you’ll need an HTML format report.
Recommended reading- “5 Best WooCommerce Measurement Calculator Plugins in 2024”
Wrapping Up!
Exporting orders from WooCommerce is a useful feature that can help you manage your online store more efficiently. Whether you need to share your order data with stakeholders, dropshippers, shipping partners, or accounting software, you can easily export your orders in CSV or XML format using the Advanced Order Export for WooCommerce plugin.
In this blog, we showed you how to export WooCommerce orders in simple steps to successfully export orders from your WooCommerce site. It doesn’t matter if you are a beginner or a WooCommerce website developer, by following these steps, you can export your orders in a matter of minutes and use them for various purposes. We hope you found this article helpful and learned how to export orders from WooCommerce.